
Create Azure AD App Registration with Microsoft.Graph PowerShell
Hi All,
In this Blog Post i explain you how to create an Azure AD App Registration with the Microsoft.Graph PowerShell.
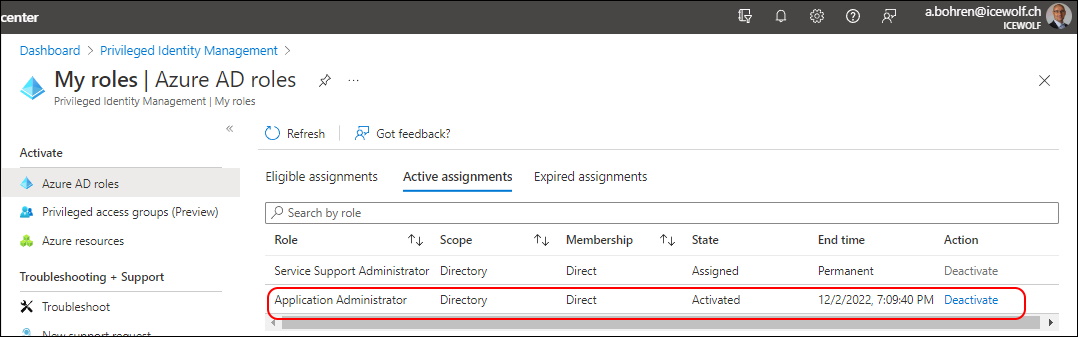
You need to have the Azure Active Directory Role “Application Administrator” or “Application Developer”.
By the way. All the Code is used here is also on my GitHub Repo
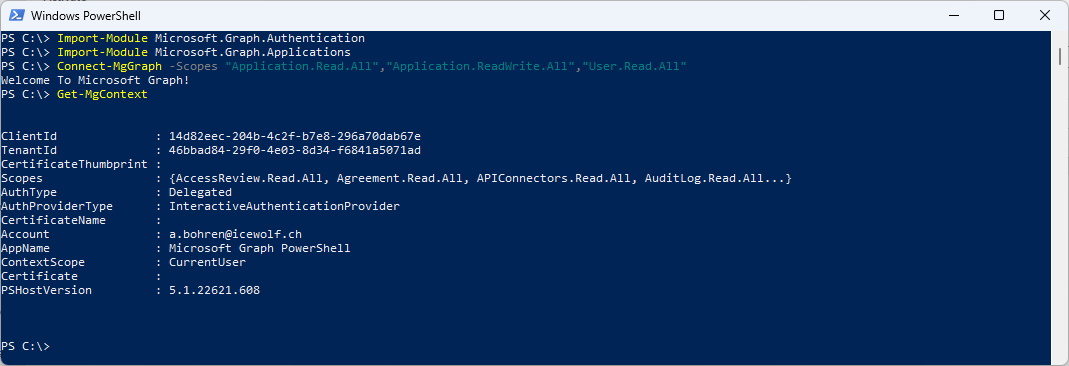
#Import Module
Import-Module Microsoft.Graph.Authentication
Import-Module Microsoft.Graph.Applications
###############################################################################
#Connect-MgGraph
#Connect to your Azure Active Directory with "Application Adminstrator" or "Global Administrator" Role
###############################################################################
Connect-MgGraph -Scopes "Application.Read.All","Application.ReadWrite.All","User.Read.All"
Get-MgContext
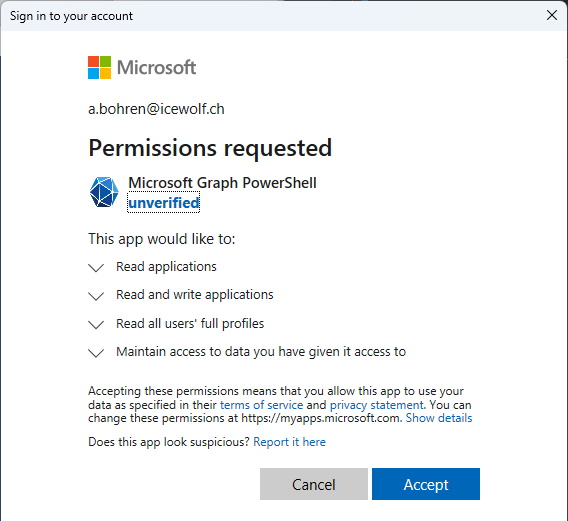
That’s the User Approval when you sign in to Microsoft Graph with these Scopes
###############################################################################
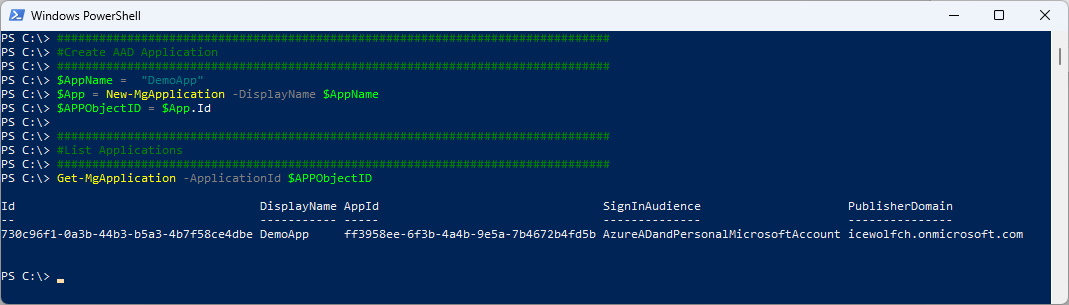
#Create AAD Application
###############################################################################
$AppName = "DemoApp"
$App = New-MgApplication -DisplayName $AppName
$APPObjectID = $App.Id
###############################################################################
#List Applications
###############################################################################
Get-MgApplication -ApplicationId $APPObjectID
List all the Details of an Application
Get-MgApplication | Where-Object_.DisplayName -eq "DemoApp"} | Format-List
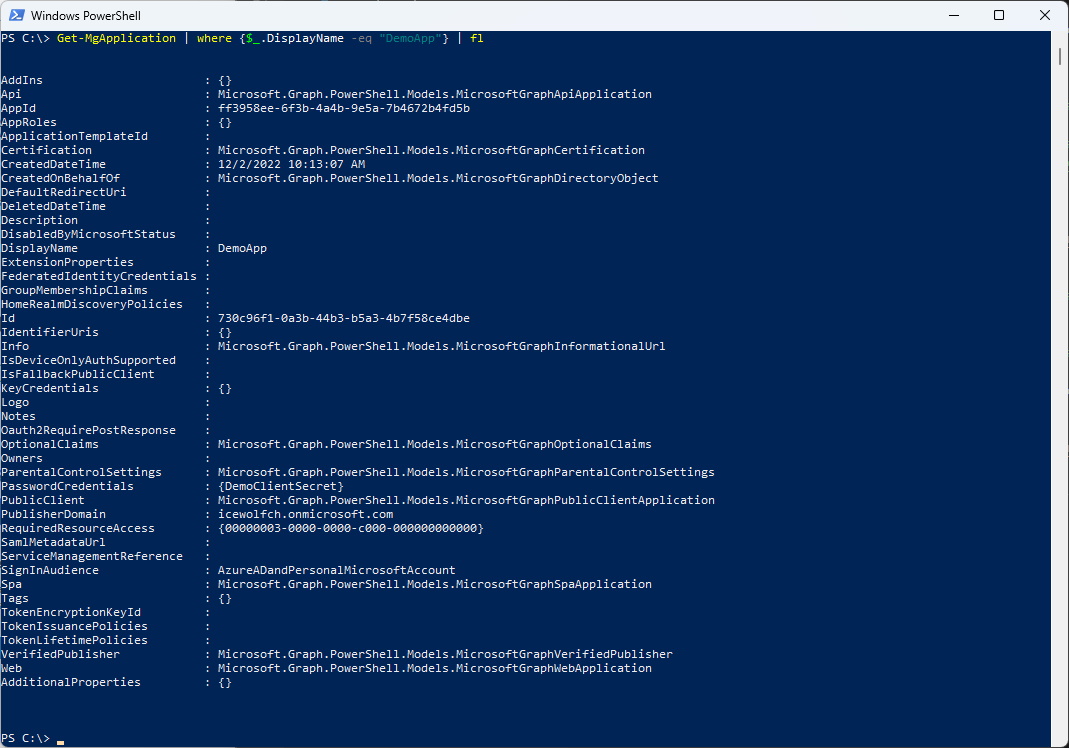
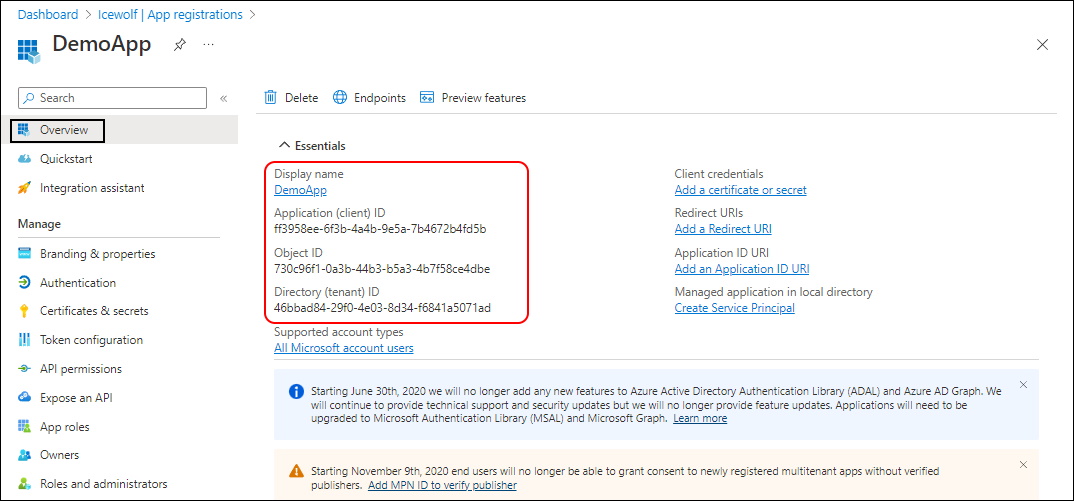
There you have it - the Application has been created
###############################################################################
#Add additional Owner
#The User who created the Application is automatically the Owner
###############################################################################
$User = Get-MgUser -UserId "m.muster@icewolf.ch"
$ObjectId = $User.ID
$NewOwner = @{
    "@odata.id"= "https://graph.microsoft.com/v1.0/directoryObjects/{$ObjectId}"
    }
New-MgApplicationOwnerByRef -ApplicationId $APPObjectID -BodyParameter $NewOwner

The Owner has been addet to the Application

###############################################################################
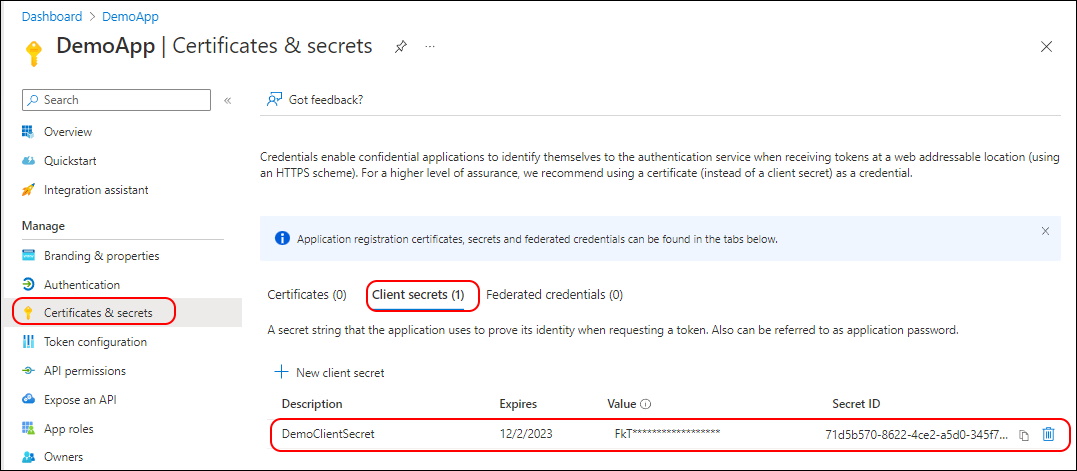
#Add a ClientSecret
###############################################################################
$passwordCred = @{
"displayName" = "DemoClientSecret"
"endDateTime" = (Get-Date).AddMonths(+12)
}
$ClientSecret2 = Add-MgApplicationPassword -ApplicationId $APPObjectID -PasswordCredential $passwordCred
$ClientSecret2
$ClientSecret2.SecretText
#Show ClientSecrets
$App = Get-MgApplication -ApplicationId $APPObjectID
$App.PasswordCredentials

You have to patient in the Portal. It takes a Minute or so and needs a refresh of the whole Page to see the Client Secret.
###############################################################################
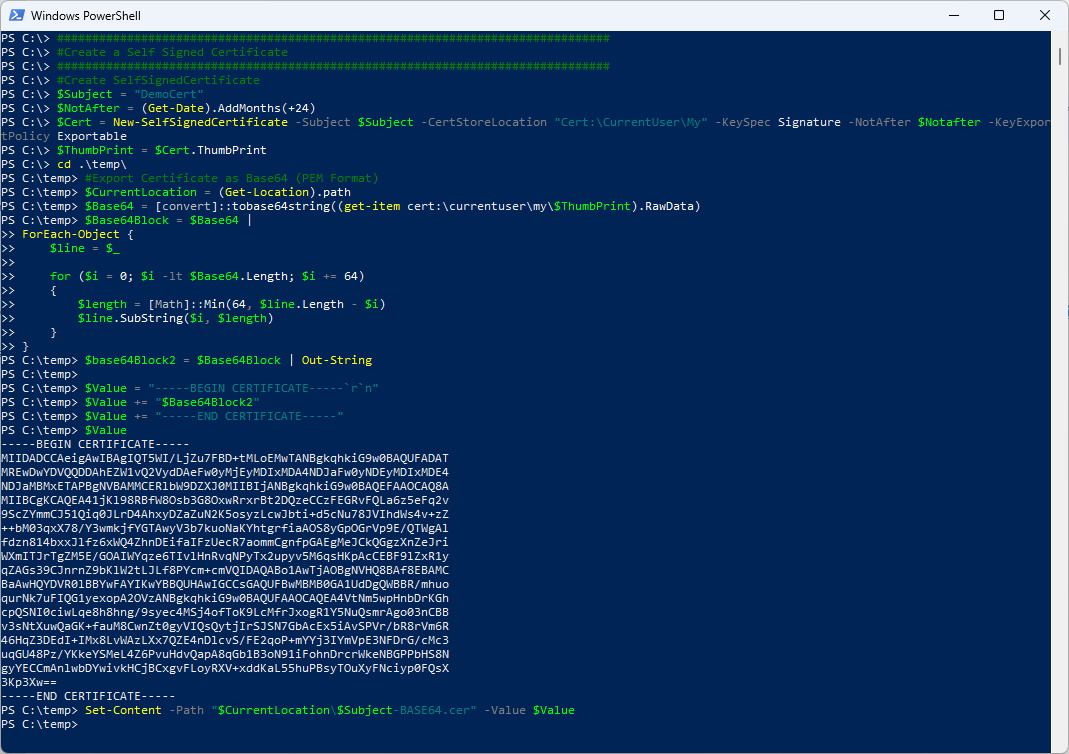
#Create a Self Signed Certificate
###############################################################################
#Create SelfSignedCertificate
$Subject = "DemoCert"
$NotAfter = (Get-Date).AddMonths(+24)
$Cert = New-SelfSignedCertificate -Subject $Subject -CertStoreLocation "Cert:\CurrentUser\My" -KeySpec Signature -NotAfter $Notafter -KeyExportPolicy Exportable
$ThumbPrint = $Cert.ThumbPrint
#View Certificates in the Current User Certificate Store
Get-ChildItem -Path cert:\CurrentUser\my\$ThumbPrint | Format-Table
#Export Certificate as Base64 (PEM Format)
$CurrentLocation = (Get-Location).path
$Base64 = [convert]::tobase64string((get-item cert:\currentuser\my\$ThumbPrint).RawData)
$Base64Block = $Base64 |
ForEach-Object {
$line = $\_
for ($i = 0; $i -lt $Base64.Length; $i += 64)
{
$length = [Math]::Min(64, $line.Length - $i)
$line.SubString($i, $length)
}
}
$base64Block2 = $Base64Block | Out-String
$Value = "-----BEGIN CERTIFICATE-----`r`n"
$Value += "$Base64Block2"
$Value += "-----END CERTIFICATE-----"
$Value
Set-Content -Path "$CurrentLocation\$Subject-BASE64.cer" -Value $Value
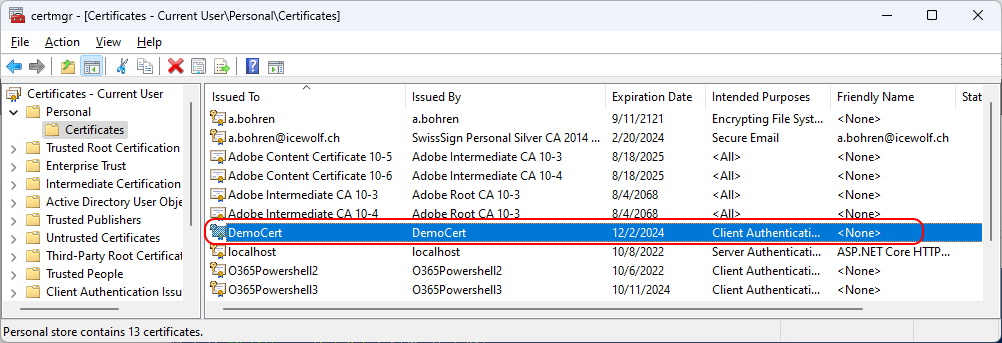
You can see the Certification in the Certificate Store of the Current User (certmgr.msc)
There are diffrent way of loading the Certificate in the $Cert Variable
###############################################################################
#Add Certificate to AzureAD App
###############################################################################
#Loading Cert from \*.cer (PEM) File
$Subject = "CN=DemoCert"
$CurrentLocation = (Get-Location).path
$CertPath = $CurrentLocation + "\" + $Subject + "-BASE64.cer"
$Cert = New-Object System.Security.Cryptography.X509Certificates.X509Certificate($CertPath)
#Get Certificate with Thumbprint from UserCertStore
$ThumbPrint = "07EFF3918F47995EB53B91848F69B5C0E78622FD"
$Cert = Get-ChildItem -Path cert:\CurrentUser\my\$ThumbPrint
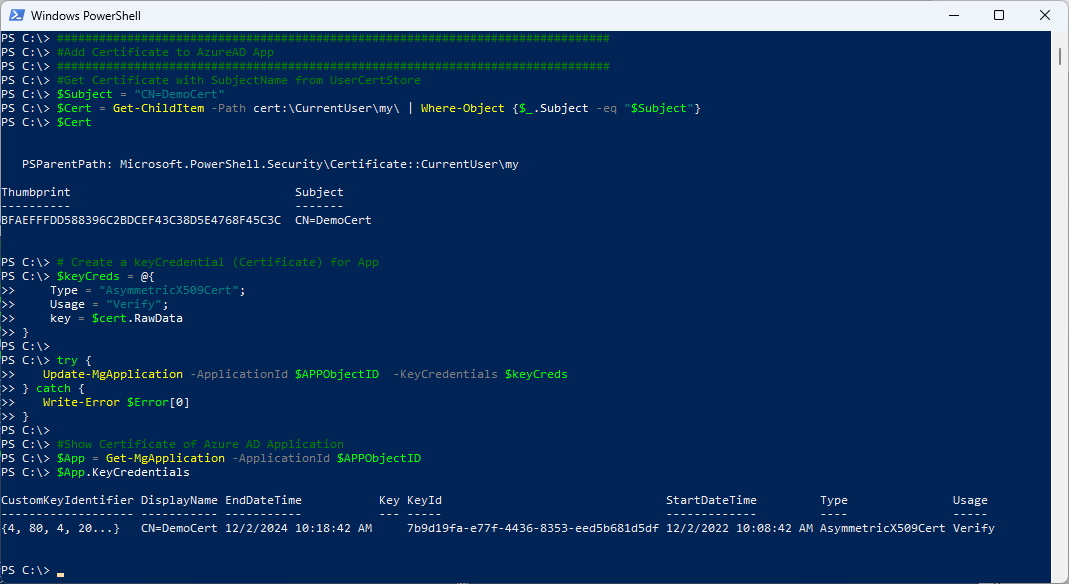
#Get Certificate with SubjectName from UserCertStore
$Subject = "CN=DemoCert"
$Cert = Get-ChildItem -Path cert:\CurrentUser\my\ | Where-Object_.Subject -eq "$Subject"}
$Cert
# Create a keyCredential (Certificate) for App
$keyCreds = @{
Type = "AsymmetricX509Cert";
Usage = "Verify";
key = $cert.RawData
}
try {
Update-MgApplication -ApplicationId $APPObjectID -KeyCredentials $keyCreds
} catch {
Write-Error $Error[0]
}
#Show Certificate of Azure AD Application
$App = Get-MgApplication -ApplicationId $APPObjectID
$App.KeyCredentials
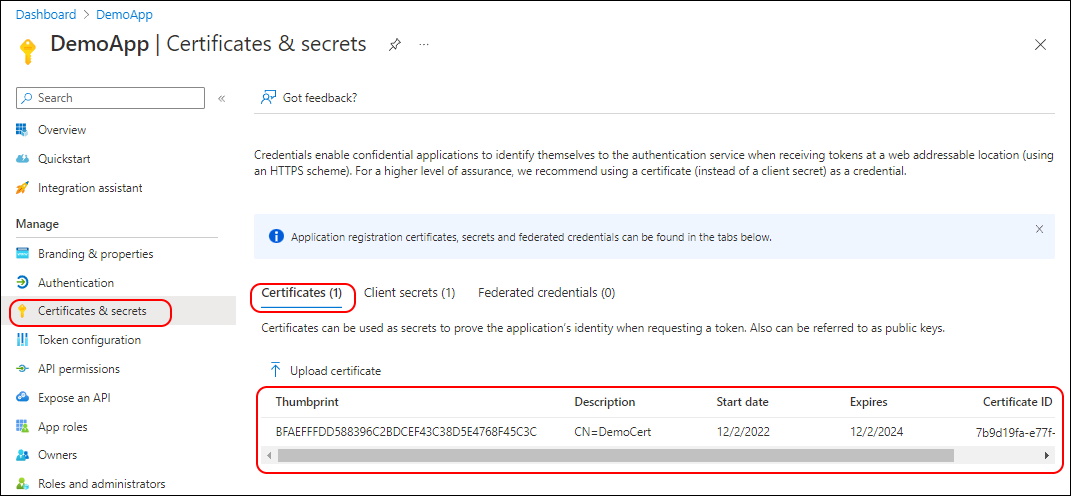
You have to patient in the Portal. It takes a Minute or so and needs a refresh of the whole Page to see the Certificate.
- MS Learn All permissions and IDs
Another way would be to add the Permission in the Portal and then check the Manifest.
###############################################################################
#Add Permissions
###############################################################################
#Add Delegated Permission
#User.ReadBasic.All    Delegated    b340eb25-3456-403f-be2f-af7a0d370277
$params = @{
    RequiredResourceAccess = @(
        @{
            ResourceAppId = "00000003-0000-0000-c000-000000000000"
            ResourceAccess = @(
                @{
                    Id = "b340eb25-3456-403f-be2f-af7a0d370277"
                    Type = "Scope"
                }
            )
        }
    )
}
Update-MgApplication -ApplicationId $APPObjectID -BodyParameter $params
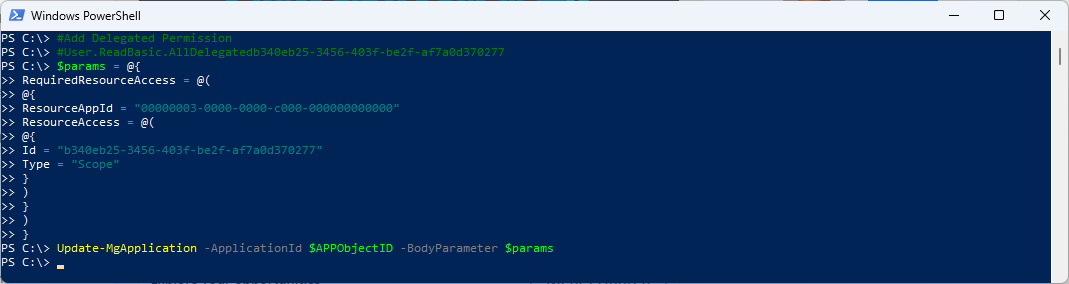
Delegated Permissions have been addet
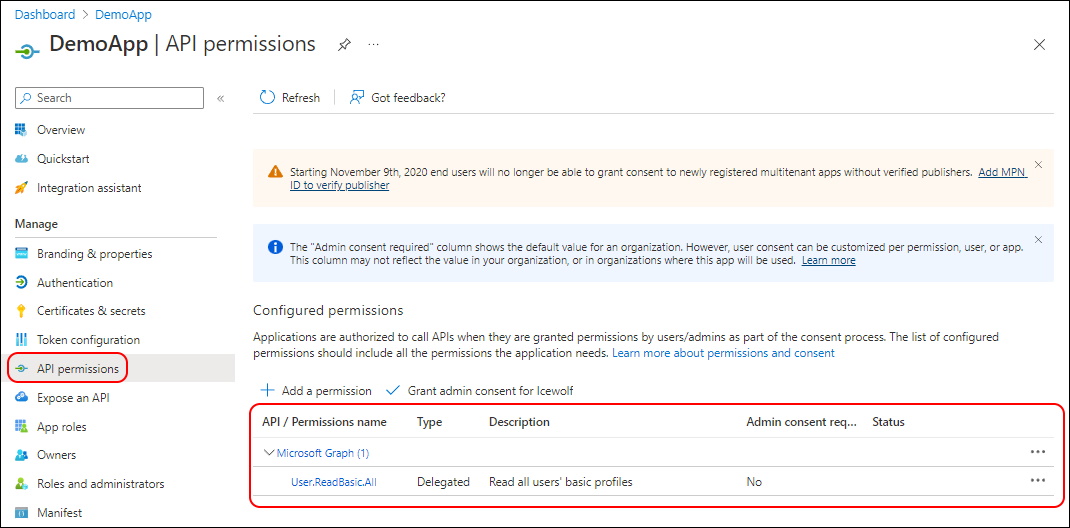
This Code replaces the Permissions
###############################################################################
#Add Permissions
###############################################################################
#Add Application Permission
#User.ReadBasic.All    Application    97235f07-e226-4f63-ace3-39588e11d3a1
$params = @{
    RequiredResourceAccess = @(
        @{
            ResourceAppId = "00000003-0000-0000-c000-000000000000"
            ResourceAccess = @(
                @{
                    Id = "97235f07-e226-4f63-ace3-39588e11d3a1"
                    Type = "Role"
                }
            )
        }
    )
}
Update-MgApplication -ApplicationId $APPObjectID -BodyParameter $params

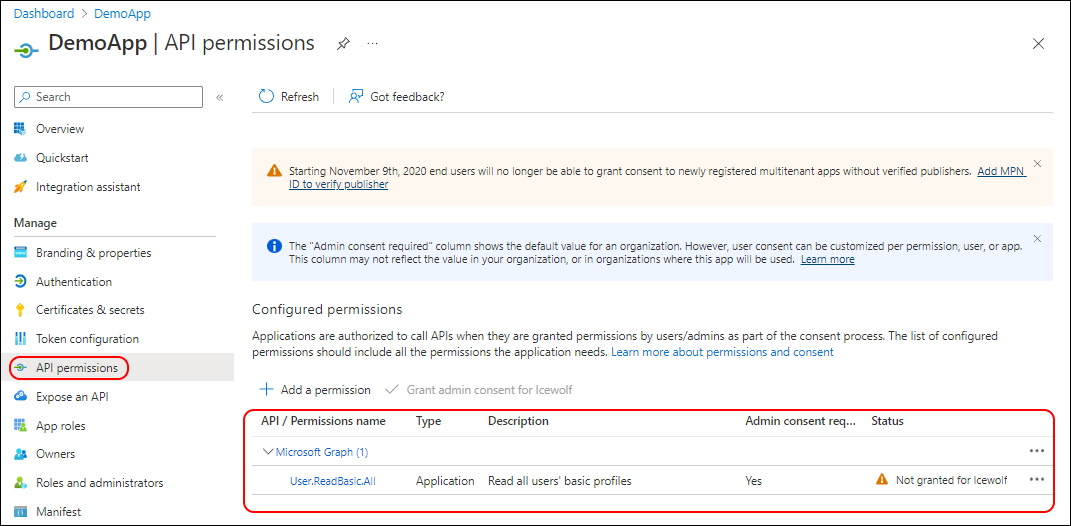
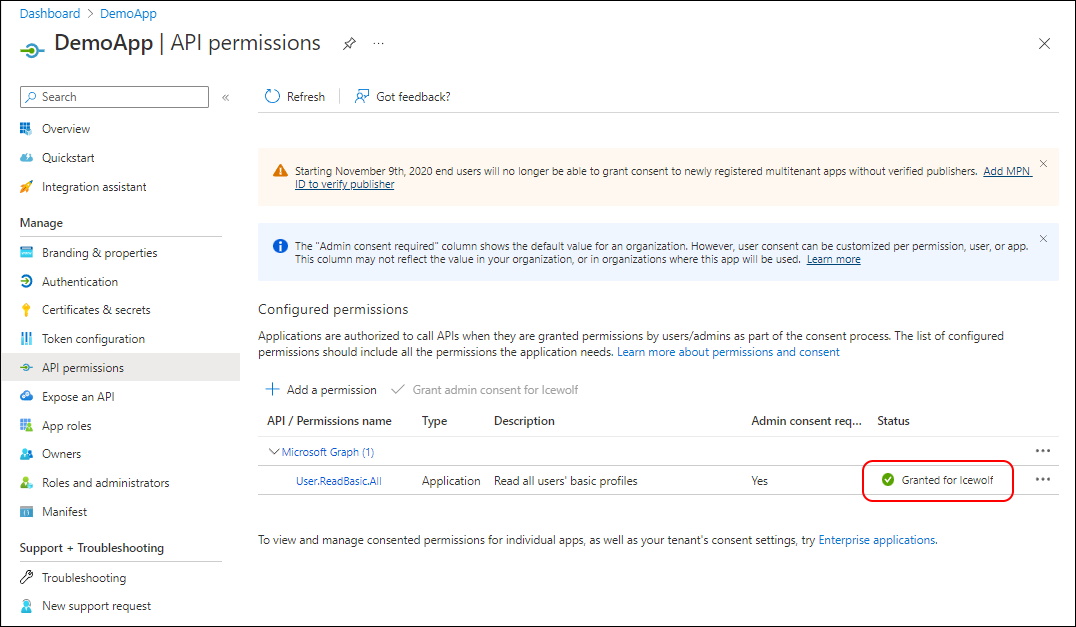
Now we have Application Permissions. Note that the Admin Consent is not yet granted.
###############################################################################
#Redirect URI
#If you need to add Redirect URI's.
###############################################################################
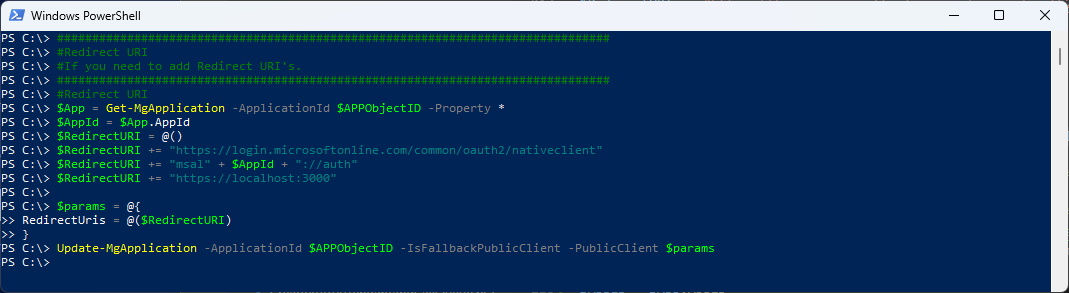
#Redirect URI
$App = Get-MgApplication -ApplicationId $APPObjectID -Property \*
$AppId = $App.AppId
$RedirectURI = @()
$RedirectURI += "https://login.microsoftonline.com/common/oauth2/nativeclient"
$RedirectURI += "msal" + $AppId + "://auth"
$RedirectURI += "https://localhost:3000"
$params = @{
RedirectUris = @($RedirectURI)
}
Update-MgApplication -ApplicationId $APPObjectID -IsFallbackPublicClient -PublicClient $params
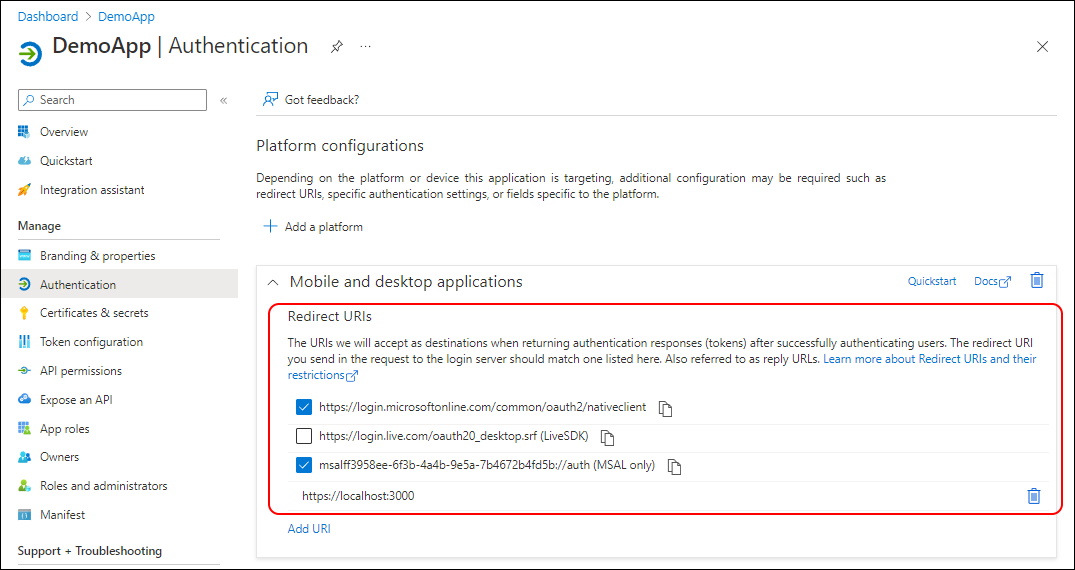
The Redirect URI’s have now been addet
###############################################################################
#Grant Admin Consent - Opens URL in Browser
###############################################################################
#https://login.microsoftonline.com/{tenant-id}/adminconsent?client\_id={client-id}
$App = Get-MgApplication | Where-Object {$_.DisplayName -eq "DemoApp"}
$TenantID = $App.PublisherDomain
$AppID = $App.AppID
$URL = "https://login.microsoftonline.com/$TenantID/adminconsent?client\_id=$AppID"
Start-Process $URL

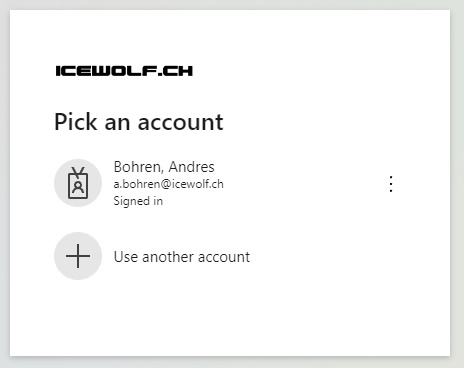
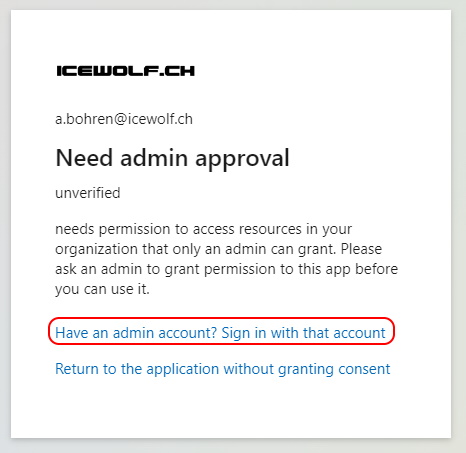
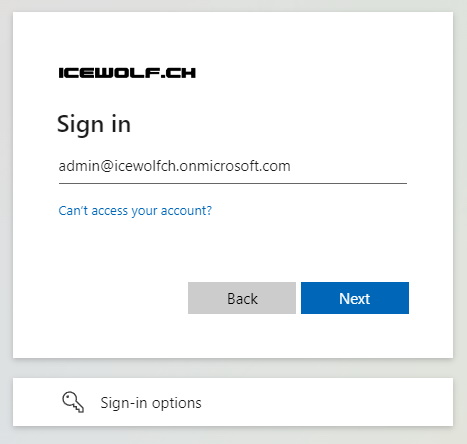
Log in with a “Global Administrator” Role
Grant Admin Consent
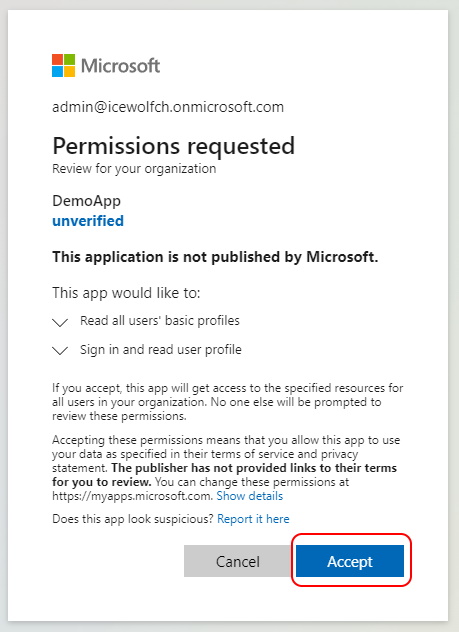
As you can see the Application has now Granted Admin consent.
###############################################################################
#Remove the Application
###############################################################################
Remove-MgApplication -ApplicationId $APPObjectID

Regards
Andres Bohren
![]()
![]()