Exchange Online custom RBAC Role with App Authentication (OAuth2)
Hi All,
I’ve already blogged about Exchange Online PowerShell V2 and Modern Auth with Application in AzureAD (Step-by-step)
- Azure AD Application Registration
- Permission: Office 365 Exchange Online > Exchange.ManageAsApp
- Add AAD App to Azure AD Role “Exchange Administrator” or “Exchange Recipient Administrator”
In this Article it’s about custom RBAC Roles and Application Authentication
-
Azure AD Application Registration
-
Permission: Office 365 Exchange Online > Exchange.ManageAsApp
-
Create a Exchange Online Service Principal for the Azure AD App
-
Create a RoleGroup and Assign ServicePrincipal (and CustomRecipientWriteScope if you want)
-
Notes from the field: Using app-only authentication with customized RBAC roles in Exchange Online
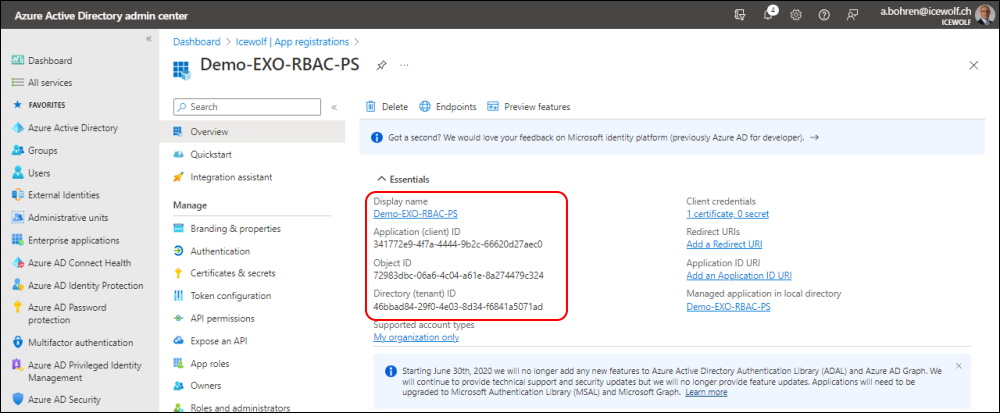
I’ve created an Azure AD App Registration
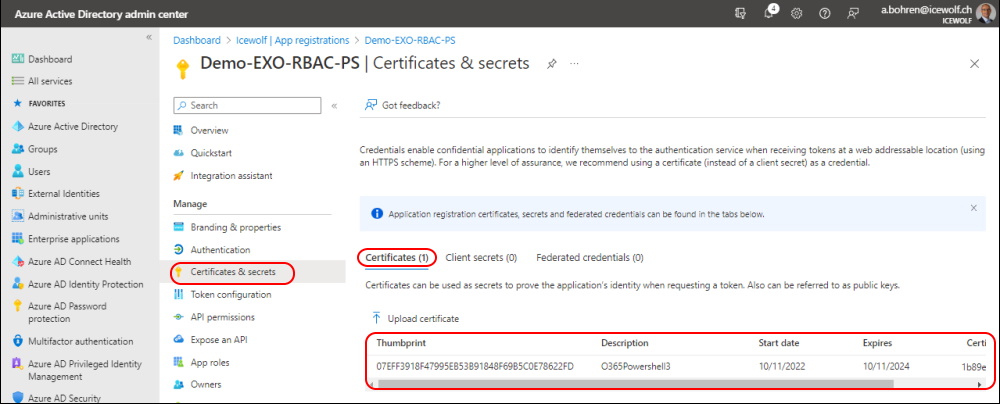
Uploaded a Certificate
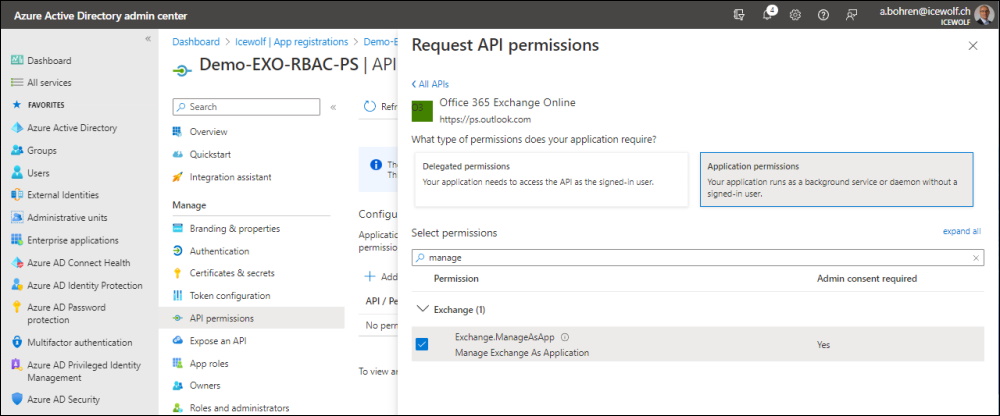
Add Permission
Add Permission > APIs my organization uses > Office 365 Exchange Online > Exchange.ManageAsApp
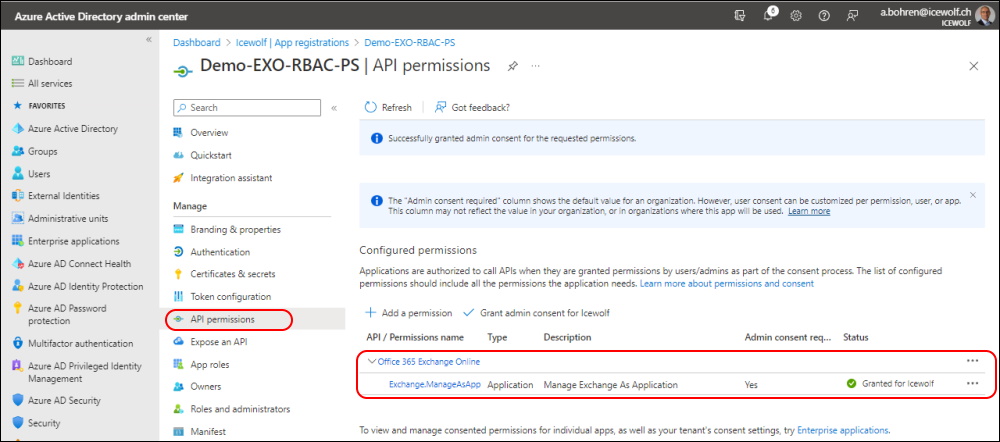
Grant Admin Consent
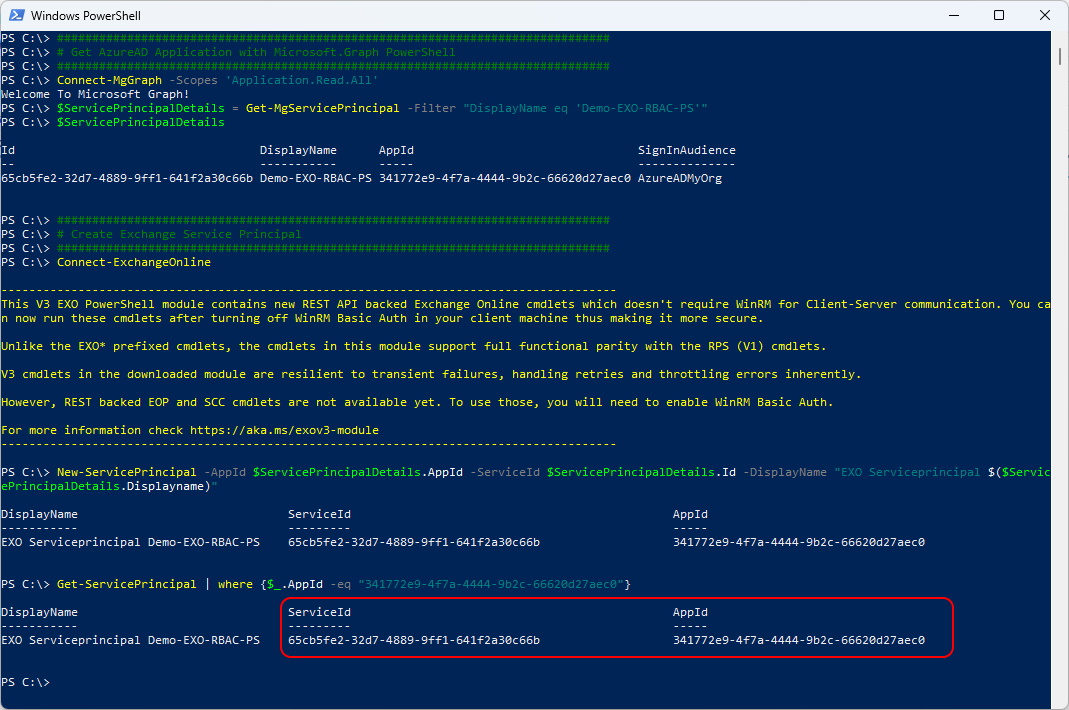
You need to create an Exchange Service Principal.
For that you need the ObjectID of the Enterprise Application
###############################################################################
# Get AzureAD Application with Microsoft.Graph PowerShell
###############################################################################
Connect-MgGraph -Scopes 'Application.Read.All'
$ServicePrincipalDetails = Get-MgServicePrincipal -Filter "DisplayName eq 'Demo-EXO-RBAC-PS'"
$ServicePrincipalDetails
###############################################################################
# Create Exchange Service Principal
###############################################################################
Connect-ExchangeOnline
New-ServicePrincipal -AppId $ServicePrincipalDetails.AppId -ServiceId $ServicePrincipalDetails.Id -DisplayName "EXO Serviceprincipal $($ServicePrincipalDetails.Displayname)"
Get-ServicePrincipal | where {$_.AppId -eq "341772e9-4f7a-4444-9b2c-66620d27aec0"}
Create the Management Scope. Please note that only the “Sitzungszimmer” Mailbox matches the Management Scope
###############################################################################
#Magagement Scope
###############################################################################
#Filterable properties for the RecipientFilter parameter on Exchange cmdlets
#https://learn.microsoft.com/en-us/powershell/exchange/recipientfilter-properties?view=exchange-ps
Get-ManagementScope
Get-Recipient -RecipientPreviewFilter "(City -eq 'Zürich') -and (RecipientTypeDetails -eq 'RoomMailbox')"
I’ve already documented how to create a Management Role in Exchange and Exchange Online
###############################################################################
#Get-ManagementRole
###############################################################################
Get-ManagementRole -Identity "ICE-UserPhoto"
Get-ManagementRoleEntry -Identity "ICE-UserPhoto\*"
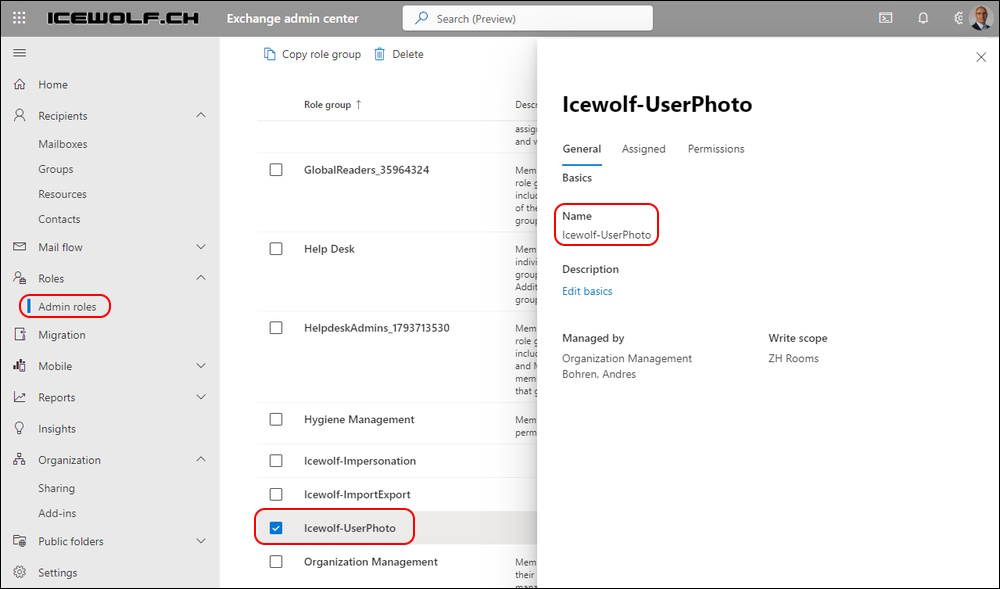
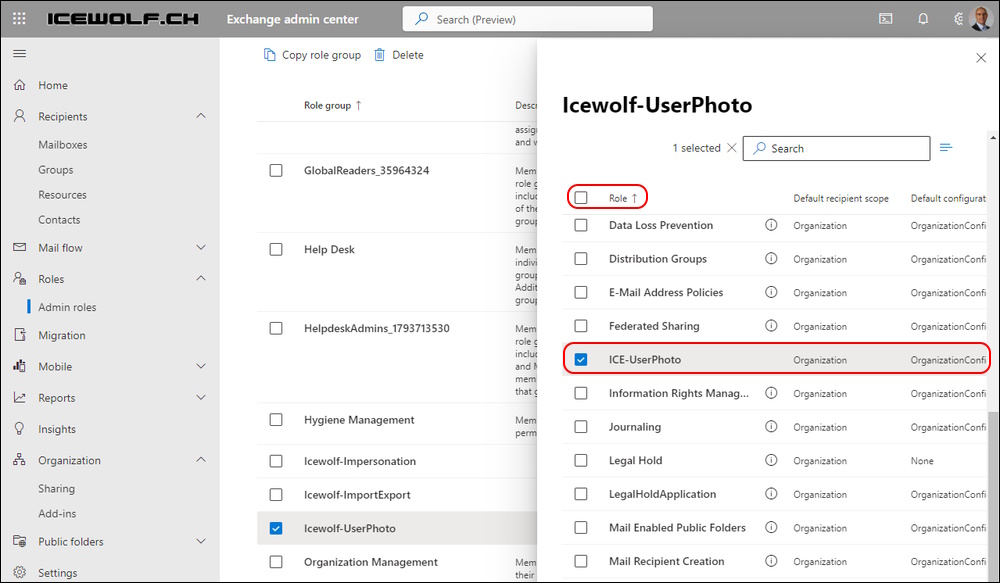
Now let’s put it all together. Assign the App the Role “Ice-UserPhoto” and assign the ResourceScope “ZH Rooms”
###############################################################################
#New-RoleGroup
###############################################################################
$AppID = "341772e9-4f7a-4444-9b2c-66620d27aec0"
$SP = Get-ServicePrincipal | where {$_.AppId -eq $AppID}
$ServiceId = $SP.ServiceId
New-RoleGroup -Name 'Icewolf-UserPhoto' -Roles "ICE-UserPhoto" -CustomRecipientWriteScope "ZH Rooms"
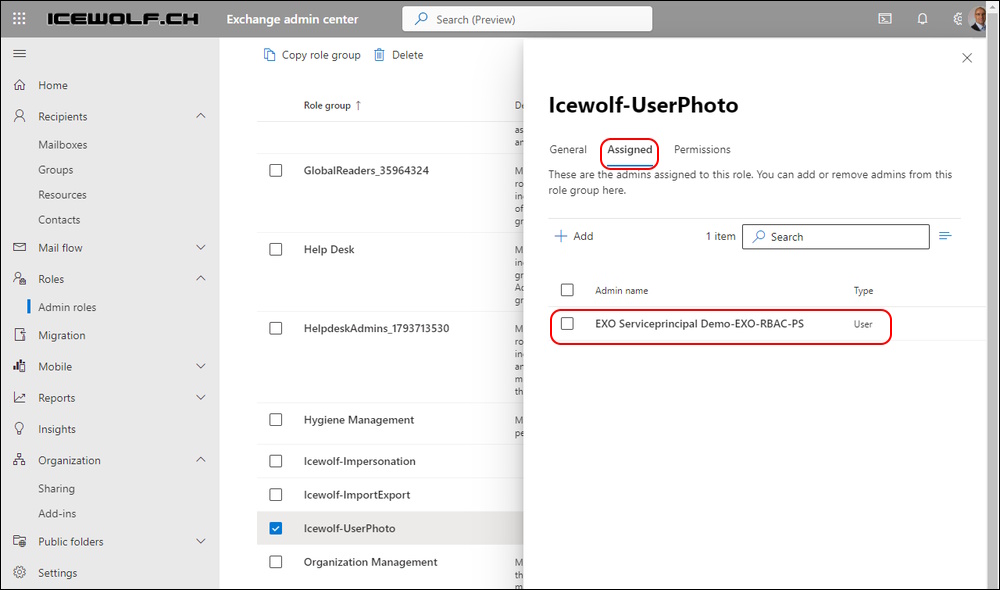
Add-RoleGroupMember -Identity "Icewolf-UserPhoto" -Member $ServiceId
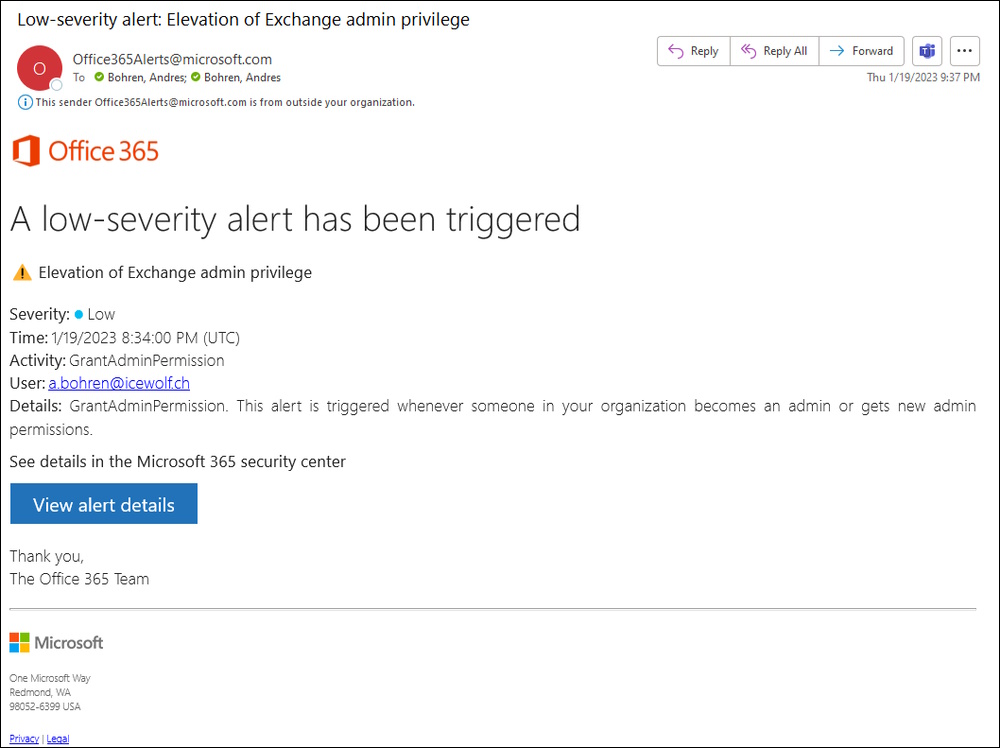
Note that this Action will trigger an Alert
###############################################################################
#Get-RoleGroup
###############################################################################
$AppID = "341772e9-4f7a-4444-9b2c-66620d27aec0"
$SP = Get-ServicePrincipal | where_.AppId -eq $AppID}
$ServiceId = $SP.ServiceId
Get-RoleGroup | where {$_.Members -Match $ServiceId} | fl
###############################################################################
#Get-ManagementRoleAssignment
###############################################################################
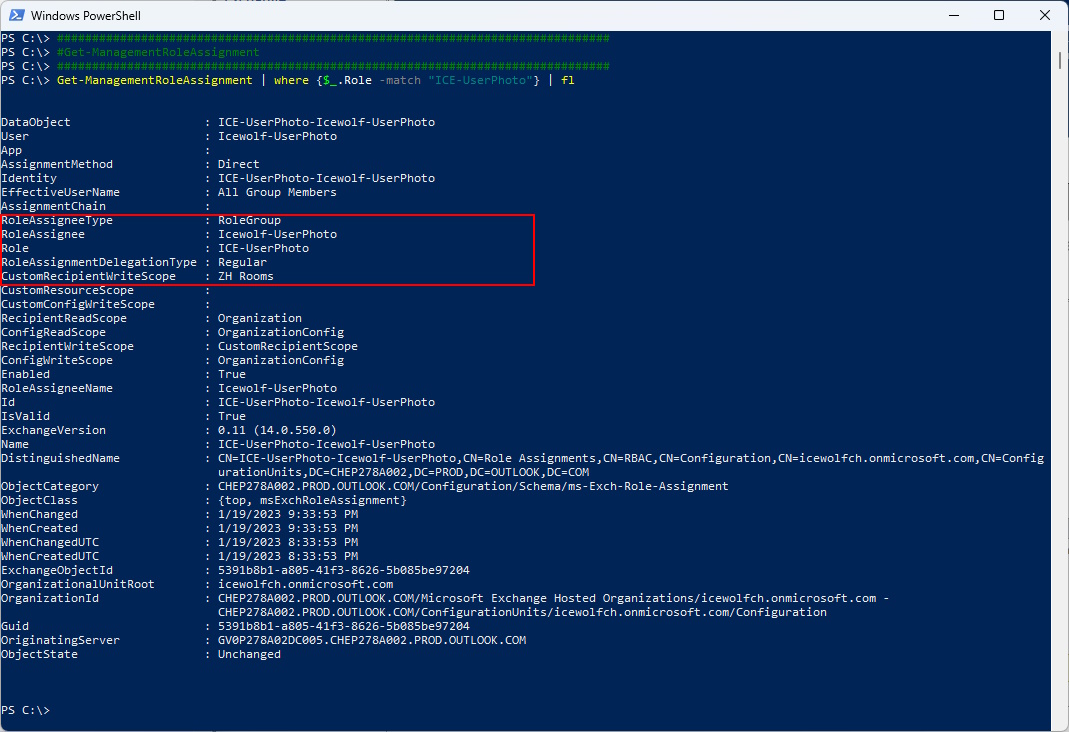
Get-ManagementRoleAssignment | where {$_.Role -match "ICE-UserPhoto"} | fl
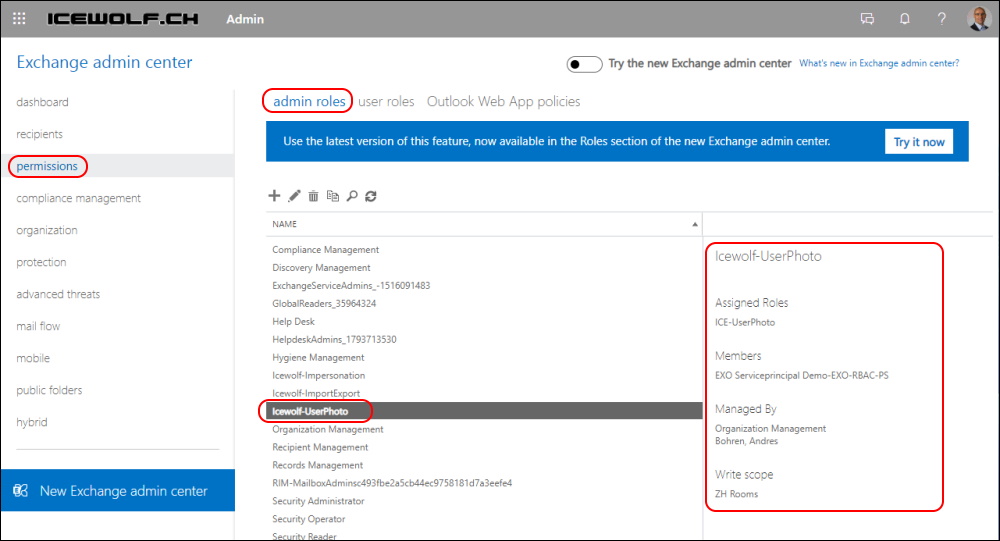
You can see the Permissions also in the Classic Exchange Online Admin Center
I recently noticed that there exists a new Menu Item Roles > Admin Roles in the Exchange Admin Center
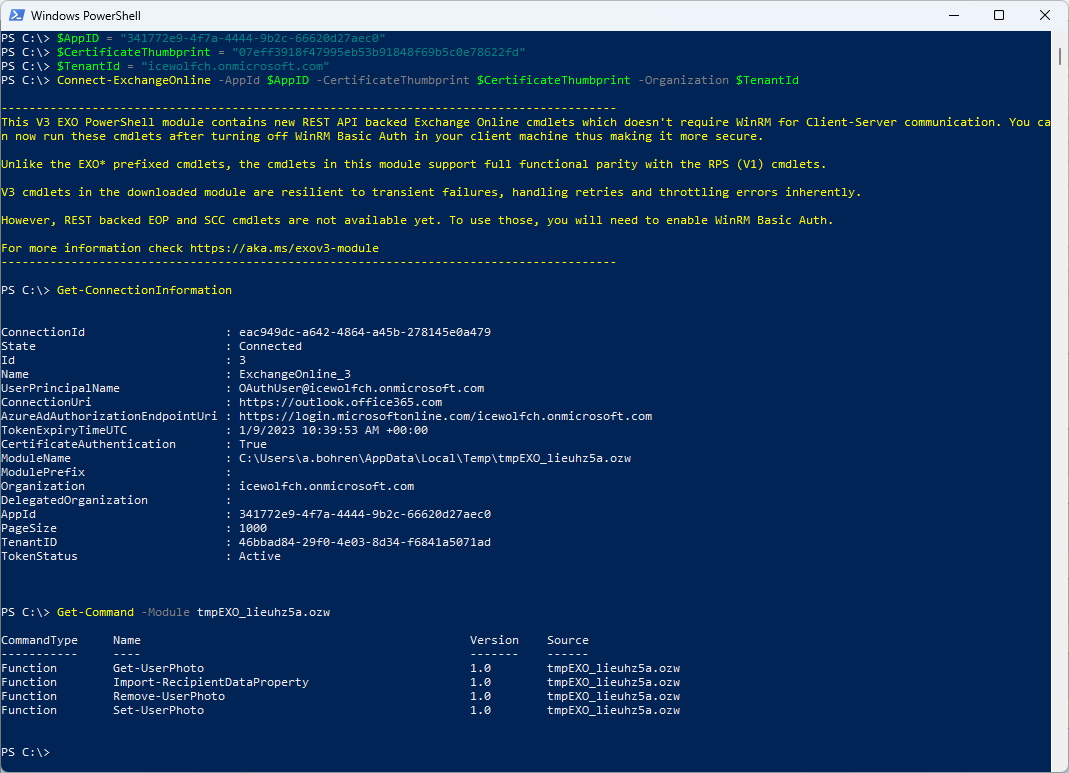
Let’s connect with the App and the Certificate
###############################################################################
#Connect-ExchangeOnline with AppId and Certificate
###############################################################################
$AppID = "341772e9-4f7a-4444-9b2c-66620d27aec0"
$CertificateThumbprint = "07eff3918f47995eb53b91848f69b5c0e78622fd"
$TenantId = "icewolfch.onmicrosoft.com"
Connect-ExchangeOnline -AppId $AppID -CertificateThumbprint $CertificateThumbprint -Organization $TenantId
Get-ConnectionInformation
Get-Comand -Module tmpEXO_xxx.xxx
Let’s try it. I will set a UserPhoto for a Mailbox that is inside the RecipientWriteScope
Set-UserPhoto -Identity Sitzungszimmer@icewolf.ch -PictureData ([System.IO.File]::ReadAllBytes("E:\Temp\AvatarBaby.jpg"))
Get-UserPhoto -Identity Sitzungszimmer@icewolf.ch
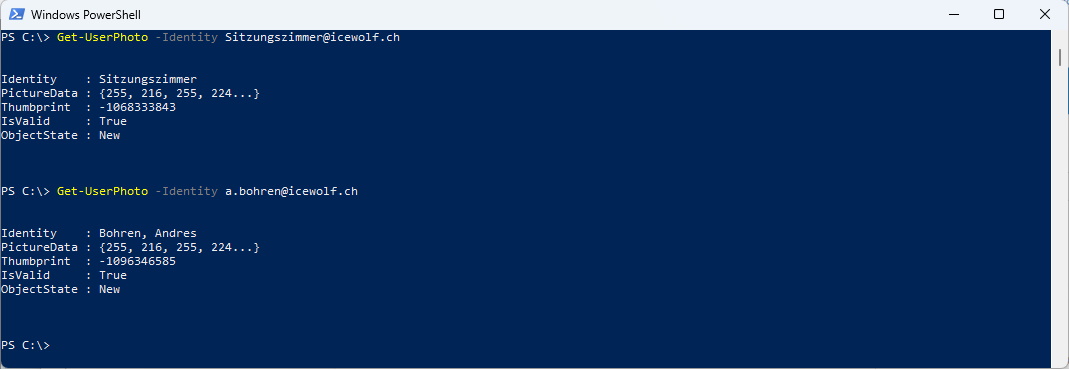
What threw me off, at first was that get works also for Mailboxes outside the Management Scope - but remember the Parameter is “CustomRecipientWriteScope”
Get-UserPhoto -Identity Sitzungszimmer@icewolf.ch
Get-UserPhoto -Identity a.bohren@icewolf.ch
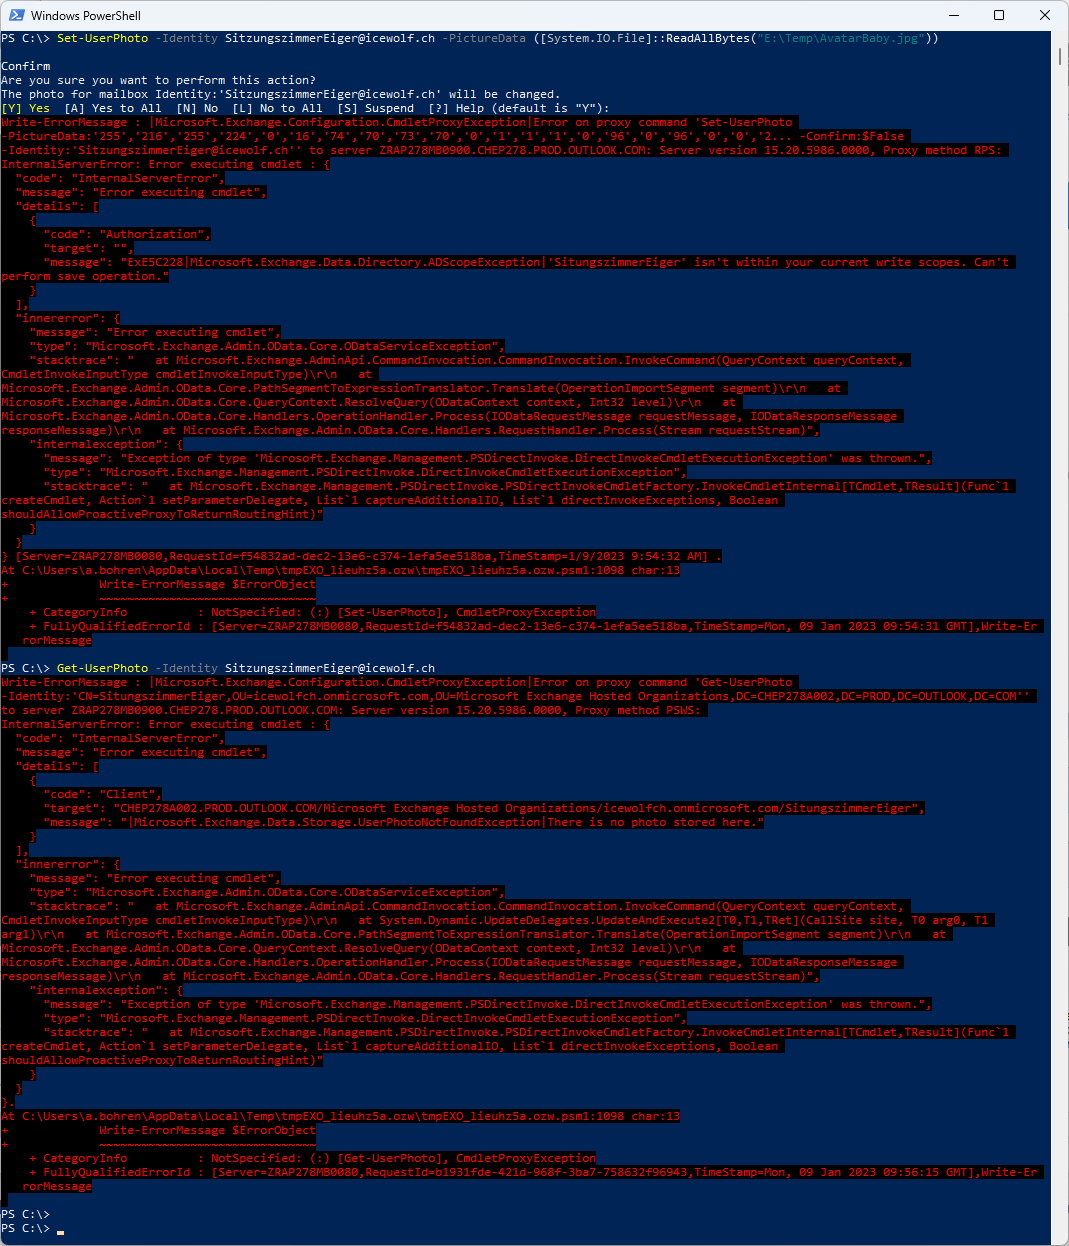
It’s not possible to Set-UserPhoto for a Mailbox that is Outside the Management Scope / CustomRecipientWriteScope.
And you also get an Error, if no Picture is set on the Mailbox
Set-UserPhoto -Identity SitzungszimmerEiger@icewolf.ch -PictureData ([System.IO.File]::ReadAllBytes("E:\Temp\AvatarBaby.jpg"))
Get-UserPhoto -Identity SitzungszimmerEiger
Regards
Andres Bohren

