
Enable DKIM in Exchange Online (updated)

Hi All,
A few years ago, i have already written an Article how to Enable DKIM in Exchange Online.
Things change over time and so does the Exchange Admin Center. Enabling DKIM has moved to the Microsoft Defender Admin Portal.
Here are some older Articles regarding DKIM
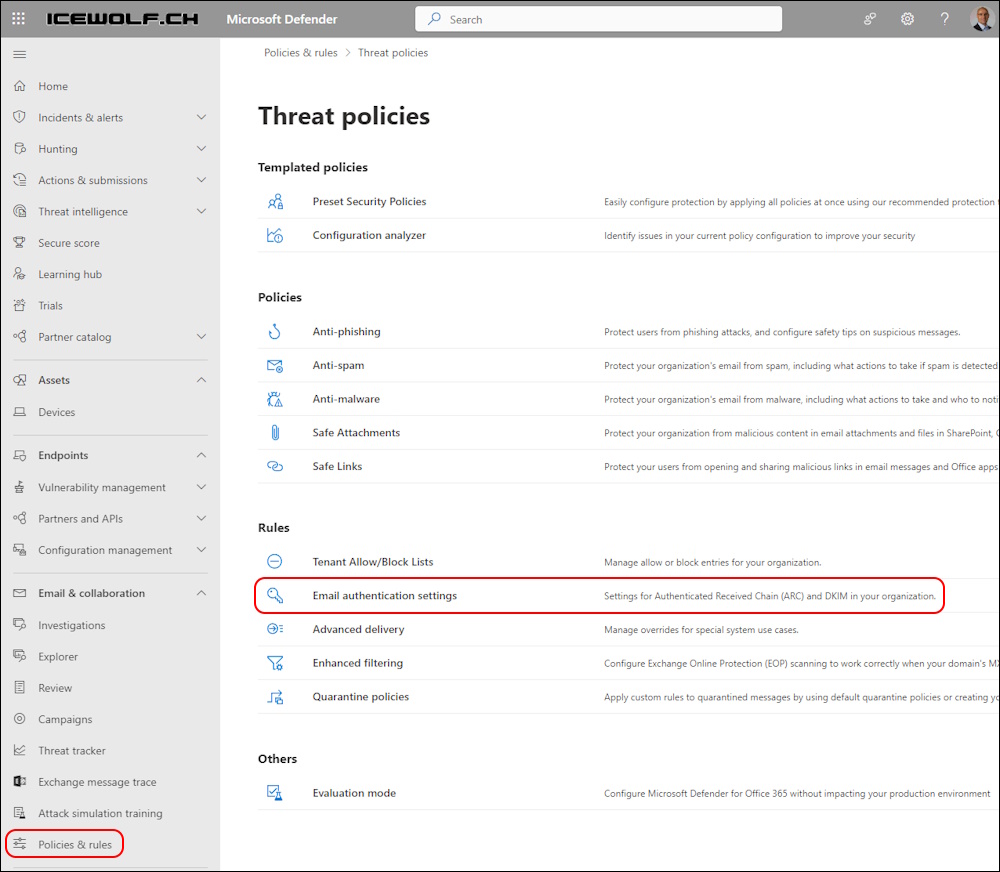
To enable DKIM in Exchange Online you have to go to the Microsoft Defender Admin Portal and select > Policies & rules > Threat Policies > Email authentication settings
Select “DKIM” in the navigation at the top
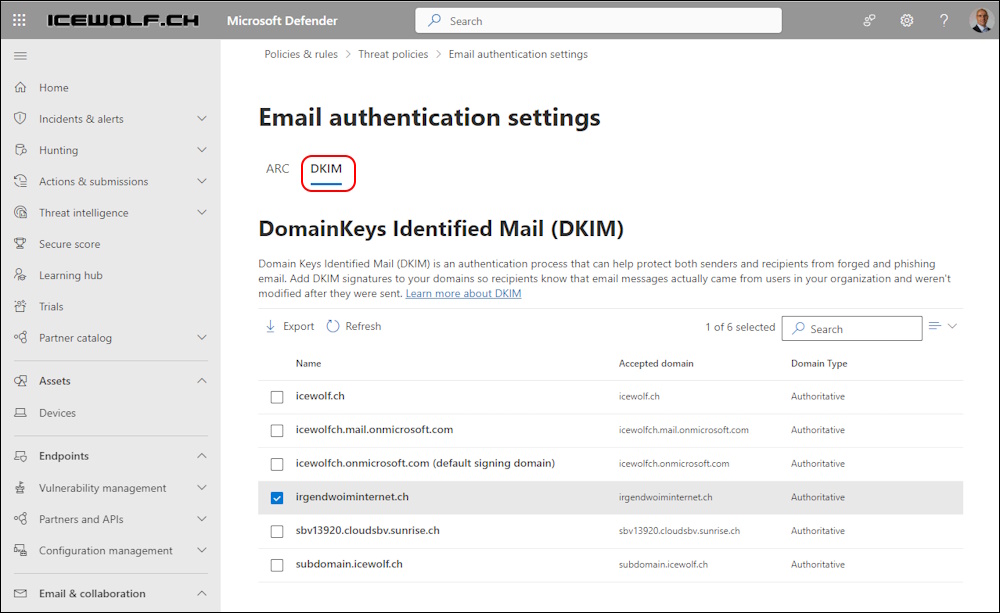
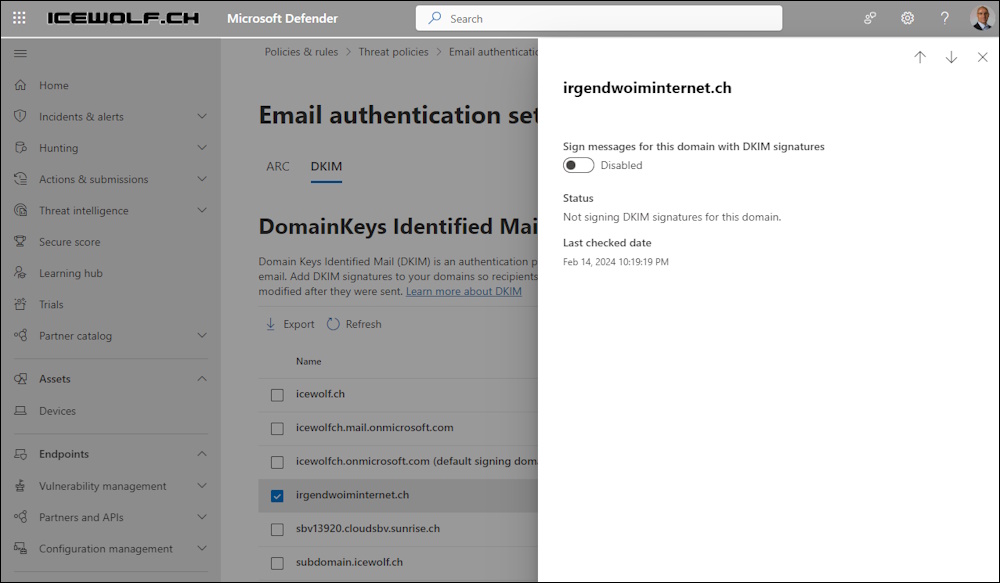
As you can see DKIM is disabled
Before you can enable DKIM, you need to create the DNS CNAME Records.
With the command below you can figure out the CNAMES you need to create
Connect-ExchangeOnline -ShowBanner:$false
Get-DkimSigningConfig irgendwoiminternet.ch | fl Domain, selector*, enabled
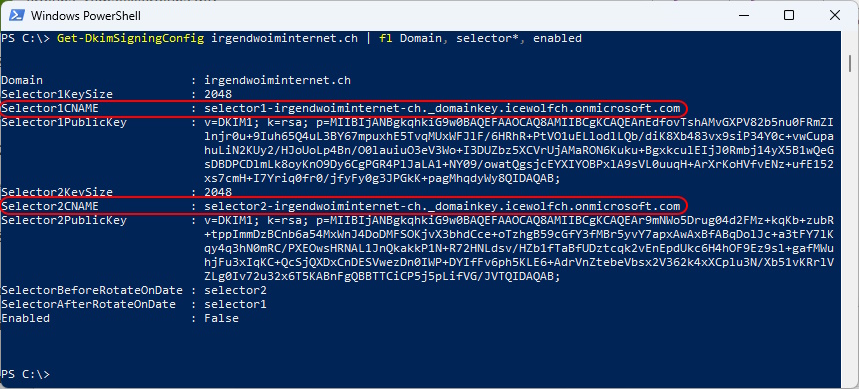
Now you need to add these DNS CNAME Records on your Domain
selector2._domainkey CNAME selector1-irgendwoiminternet-ch._domainkey.icewolfch.onmicrosoft.com
selector2._domainkey CNAME selector2-irgendwoiminternet-ch._domainkey.icewolfch.onmicrosoft.com
I have my DNS Server hosted on Azure and add the DNS Records
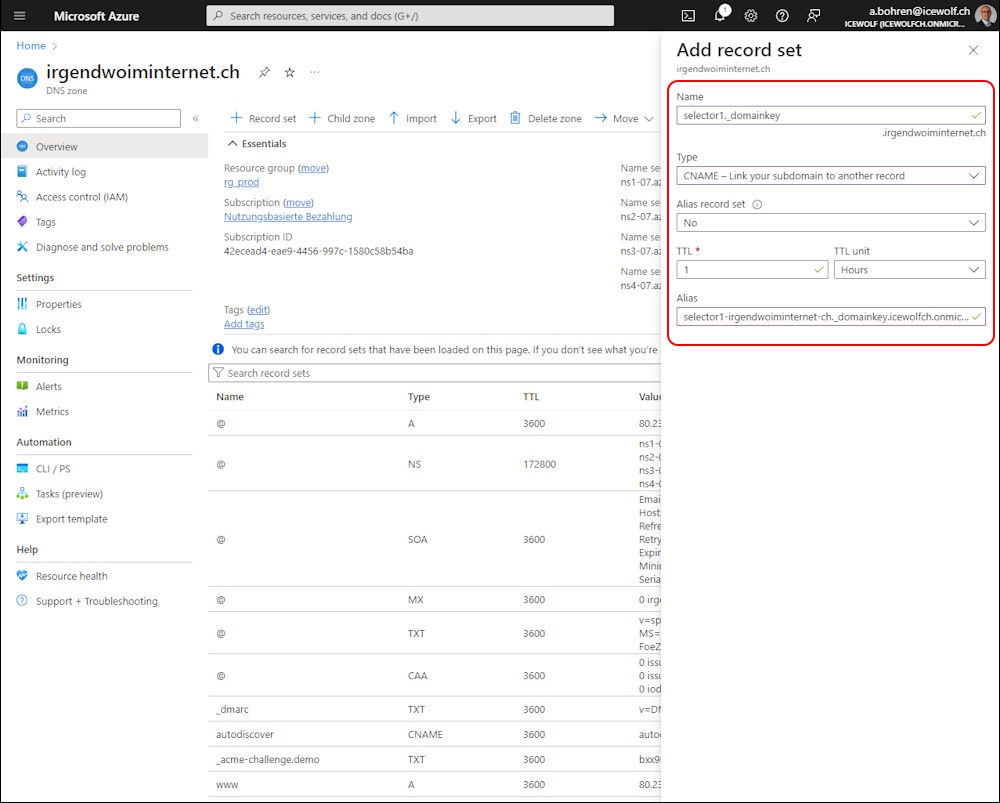
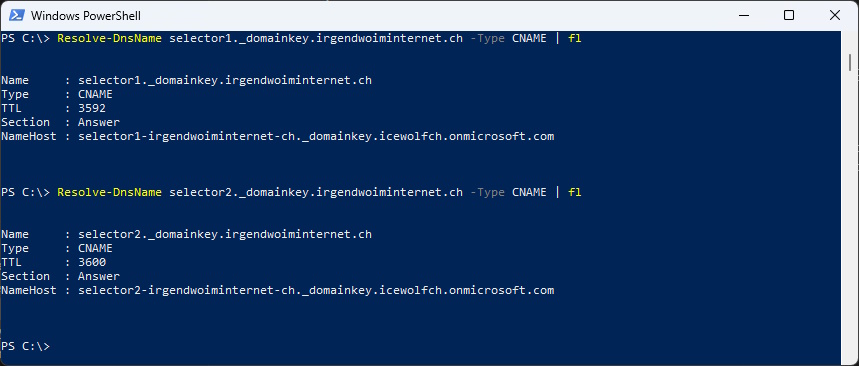
Make sure, the DNS Records are available in the Public. Sometimes it takes a little time until the DNS Records are public resolvable.
Resolve-DnsName selector1._domainkey.irgendwoiminternet.ch -Type CNAME | fl
Resolve-DnsName selector2._domainkey.irgendwoiminternet.ch -Type CNAME | fl
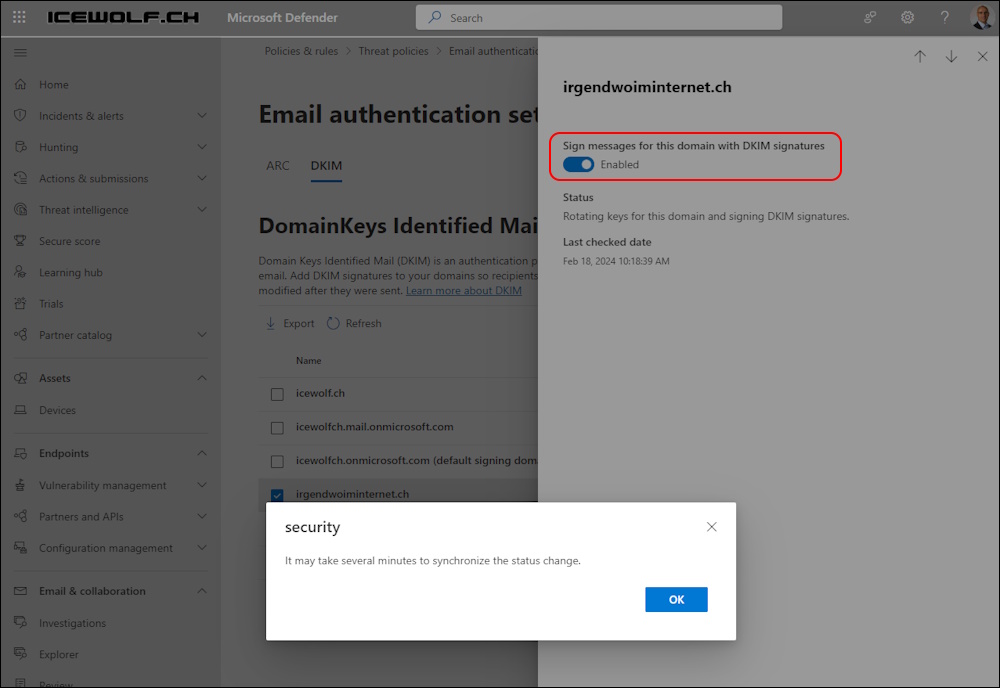
Now you can enable DKIM in the Portal
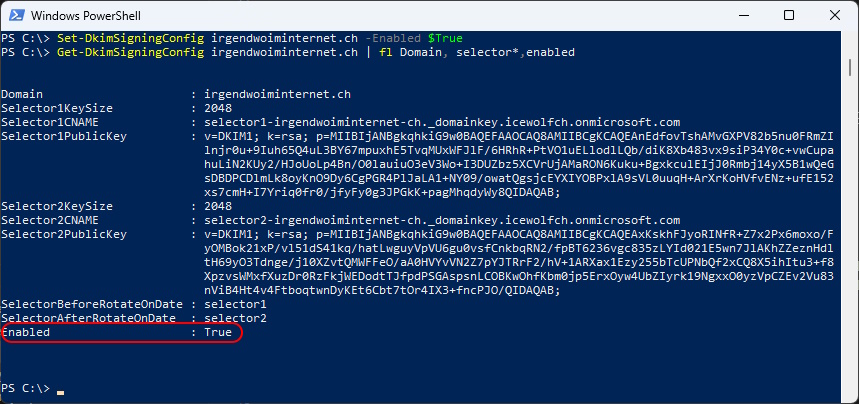
Or enable DKIM with PowerShell if you like
Set-DkimSigningConfig irgendwoiminternet.ch -Enabled $True
Get-DkimSigningConfig irgendwoiminternet.ch | fl Domain, selector*, enabled
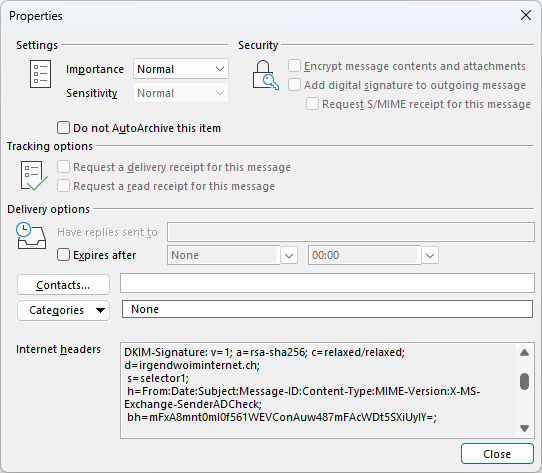
Example of a Mail received with a DKIM Signature
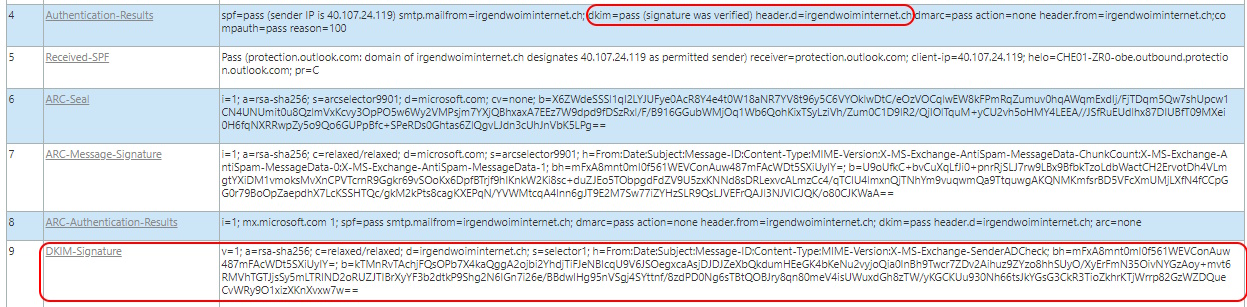
Or use the Message Header Analyzer an look out for
- Authenication Results
- DKIM-Signature
Regards
Andres Bohren
Exchange Logo Security Logo![]()
![]()
![]()
![]()