
Azure Email Communication Services (ECS)

Hi All,
Azure Communication Services (ACS) and Email Communication Services (ECS) enables developers to send transactional, bulk, and marketing emails directly from applications using Microsoft Azure. It supports both SMTP and modern SDKs, offers custom domain integration with SPF and DKIM authentication, and provides delivery tracking, analytics, and scalable cloud-based email delivery. As part of Azure Communication Services, it can be combined with SMS, voice, video, and chat capabilities to build rich customer communication solutions
Update 2026-09-24: Beginning October 23, 2026, new customers can’t sign up for Azure Communication Services retiring services. Customers with an Azure Communication Services resource created before October 23, 2026, can continue using their existing resources and retiring services to support current business workloads during the transition period. Retirement and breaking changes guide for Azure Communication Services
Let’s calculate 100'000 Mails with a Size of 1 MB
| Mails per Month | Price per Unit | Total |
|---|---|---|
| 100'000 Mails | 0.00021 CHF | 21 CHF |
| 100'000 Mails x 1MB | 0.00010 CHF | 10 CHF |
| TOTAL | 31 CHF |
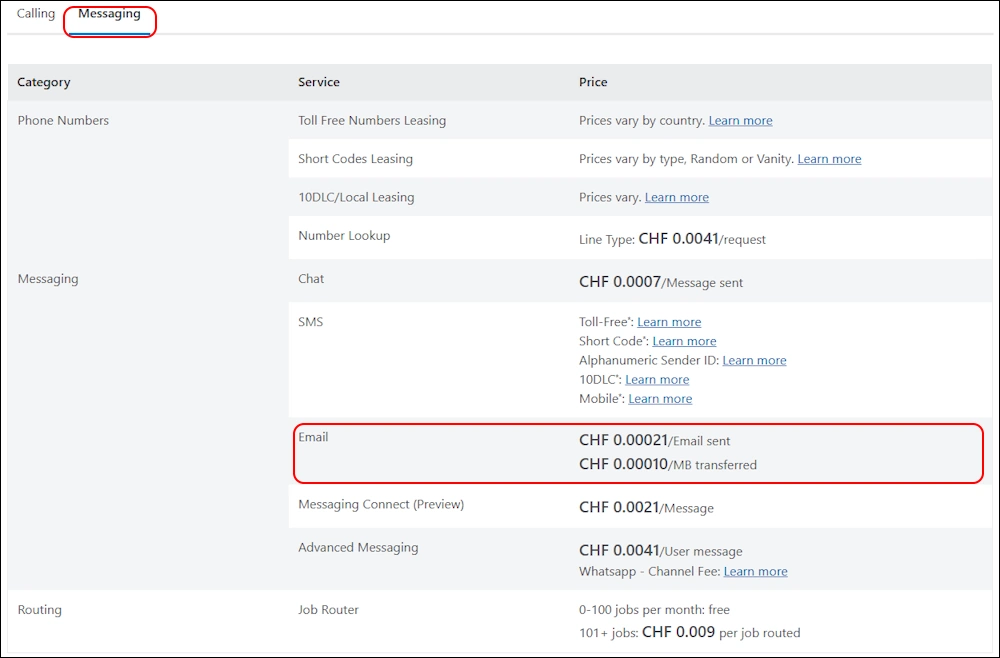
- Also have a close look at the Service Limits of Email Communication Services
Custom Domain
- 30 Mails per 1 Minute
- 100 Mails per 60 Minutes > More with Service Request
- Max 50 recipients in email > More with Service Request
- 10MB Total email request size (including attachments) > 30MB with Service Request
- Max. 250 authenticated connections per subscription
- Max. 100 SenderUsername/Mailfrom resource per domain
- Max. 100 Domains linked to a Communication Service resource
Setup
First of all we need the AZ PowerShell Modules and also AZ.Communication
Get-InstalledPSResource -Name Az.Communication -Scope CurrentUser
Install-PSResource -Name Az.Communication -Scope CurrentUser
Get-InstalledPSResource -Name Az.Communication -Scope CurrentUser
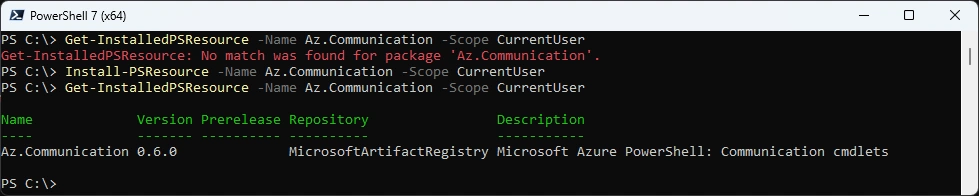
Connect to your Azure Account
# Connect-AzAccount
$SubscriptionID = "fb33f2b7-e082-4028-9fa2-98d7ecaaa105"
Connect-AzAccount -Tenant icewolfch.onmicrosoft.com -Subscription $SubscriptionID
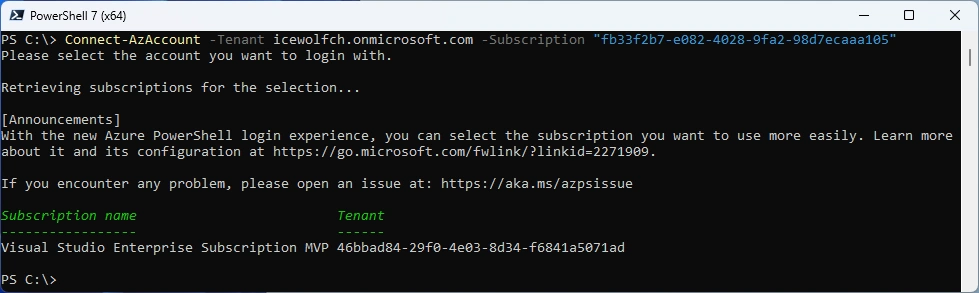
Let’s create a Resource Group
# Create Resource Group
$RGName = "RG_ACS"
$Location = "westeurope"
New-AzResourceGroup -Name $RGName -Location $Location

Now we can add the Email Communication Services (ECS)
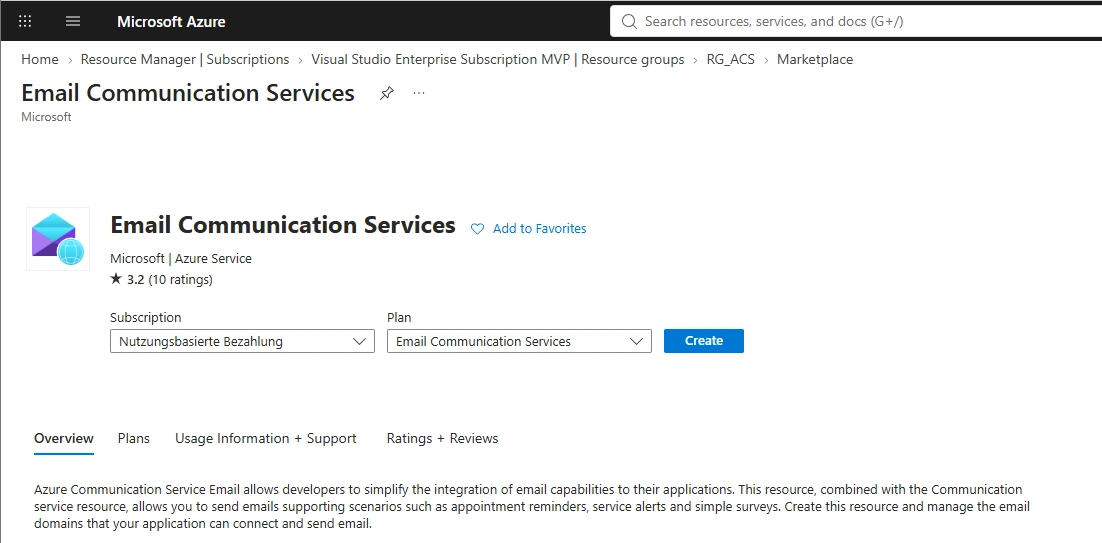
The Region is always Global, but the Data Location can be selected. But it’s a limited List.
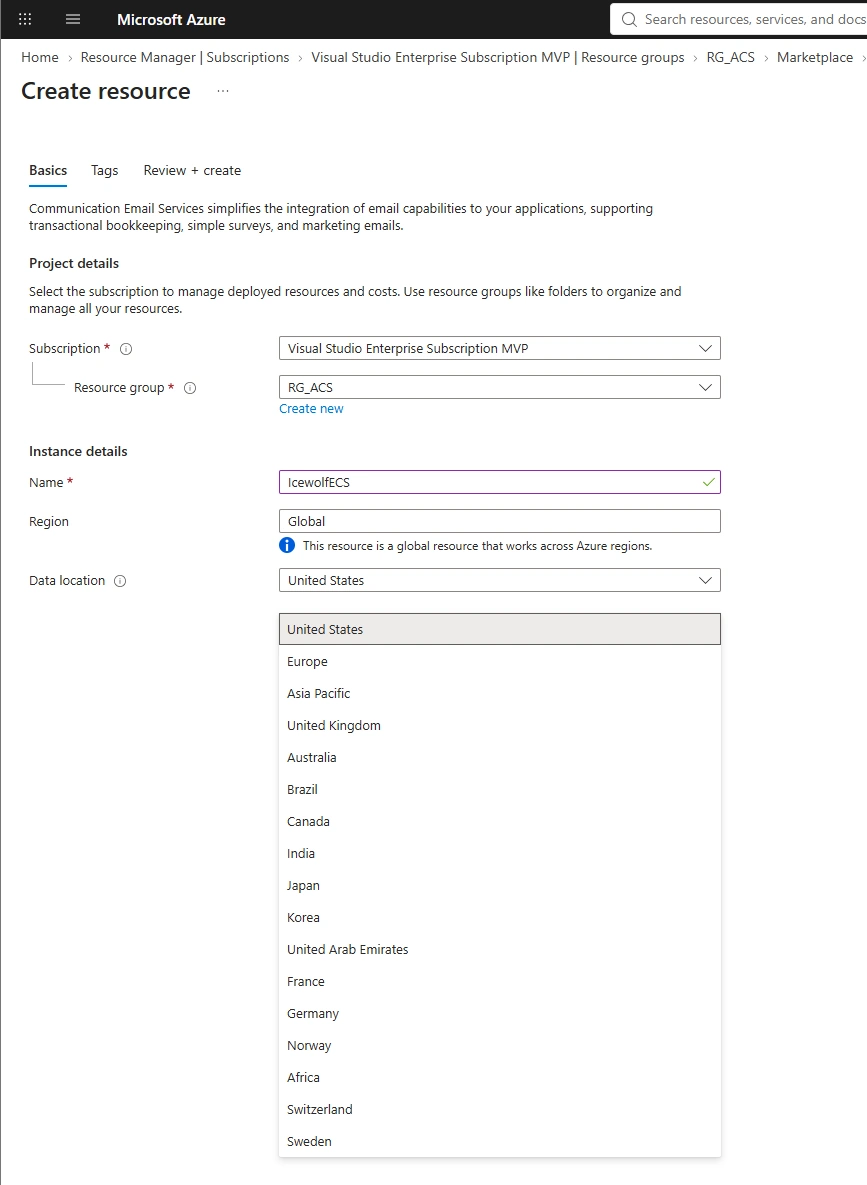
I’ve created it in the Azure Portal, but this is the Code to create it with PowerShell
# Create ECS Service
$EmailServiceName = "IcewolfECS"
$RGName = "RG_ACS"
$DataLocation = "Switzerland"
New-AzEmailService -Name $EmailServiceName -ResourceGroupName $ResourceGroup -Location "global" -DataLocation $DataLocation
Now we have an Email Communication Services (ECS) Instance in Azure
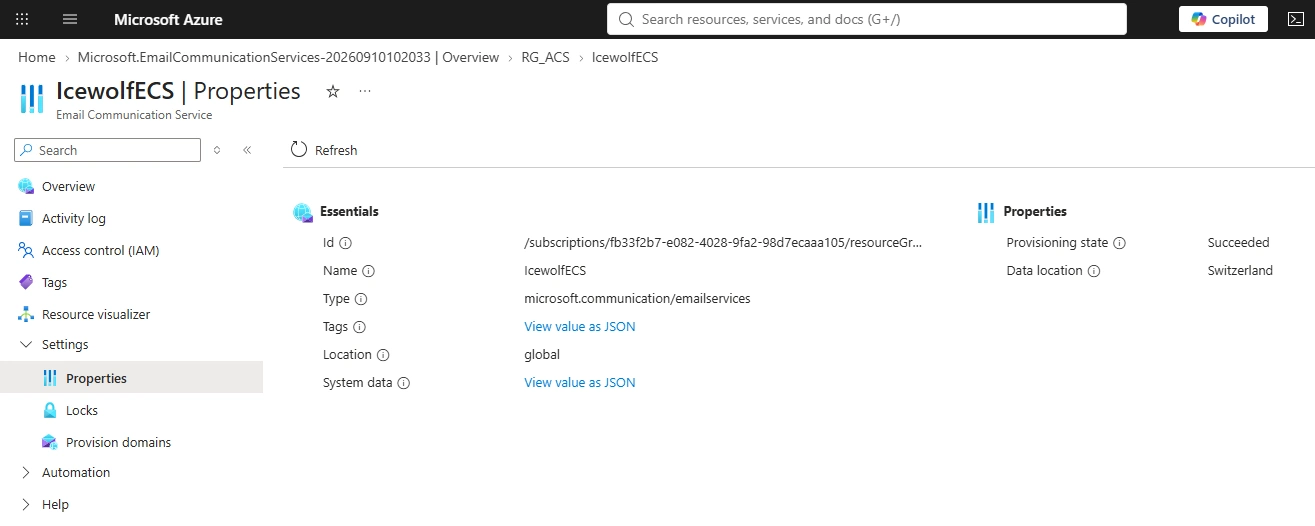
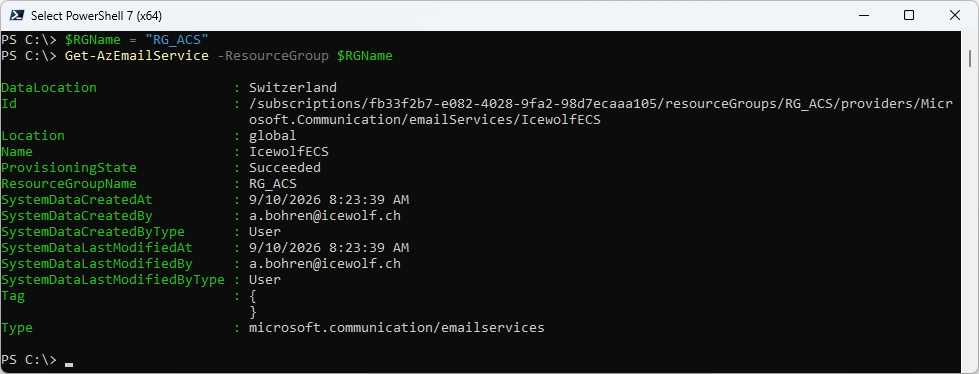
Get ECS with PowerShell
# Get ECS Service
$RGName = "RG_ACS"
Get-AzEmailService -ResourceGroup $RGName
Now we can add a custom domain - i have choosen ecs.icewolf.ch a Subdomain of icewolf.ch
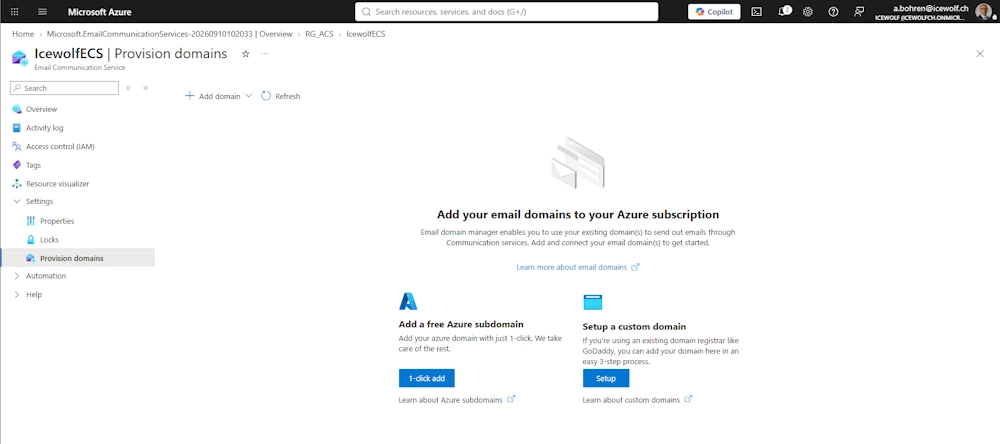
Add Custom Domain
# Custom Domain
$EmailServiceName = "IcewolfECS"
$RGName = "RG_ACS"
$CustomDomain = "ecs.icewolf.ch"
New-AzEmailServiceDomain -ResourceGroupName $RGName -EmailServiceName $EmailServiceName -Name $CustomDomain -DomainManagement "CustomerManaged"
The custom Domain needs to be verified by several DNS Records
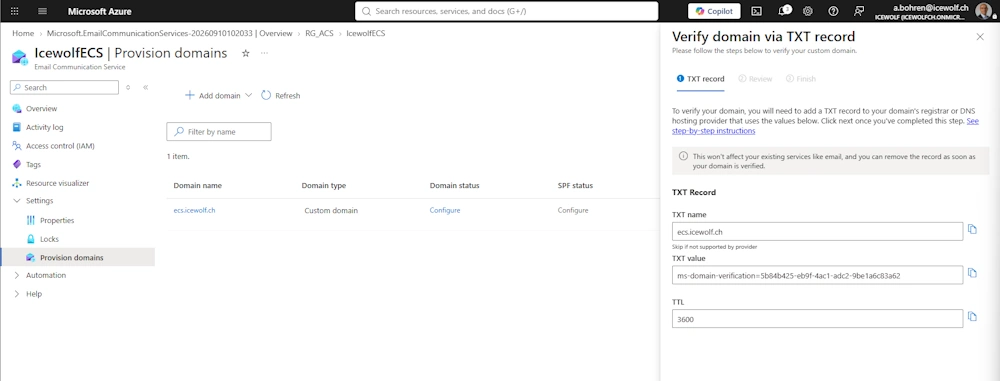
You can see the Verification Records that need to be created
# Get CustomDomain
$EmailServiceName = "IcewolfECS"
$RGName = "RG_ACS"
Get-AzEmailServiceDomain -ResourceGroup $RGName -EmailServiceName $EmailServiceName
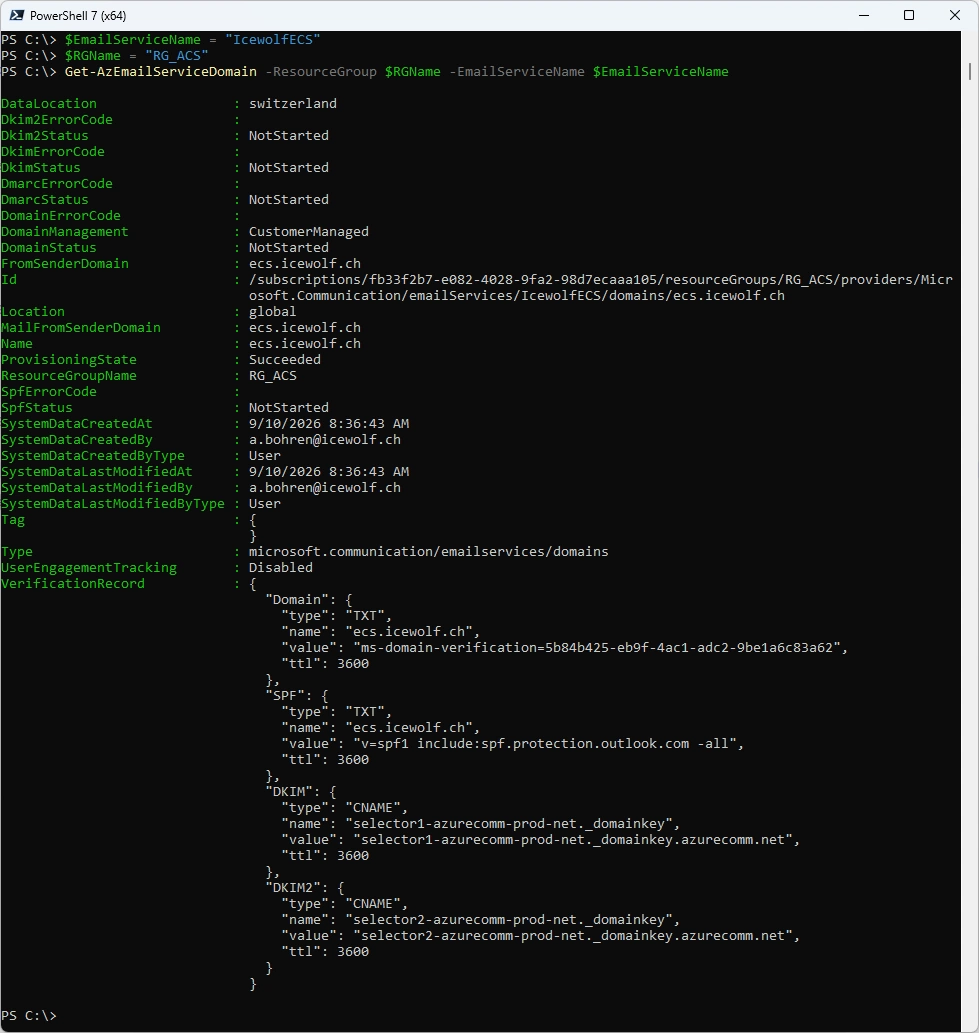
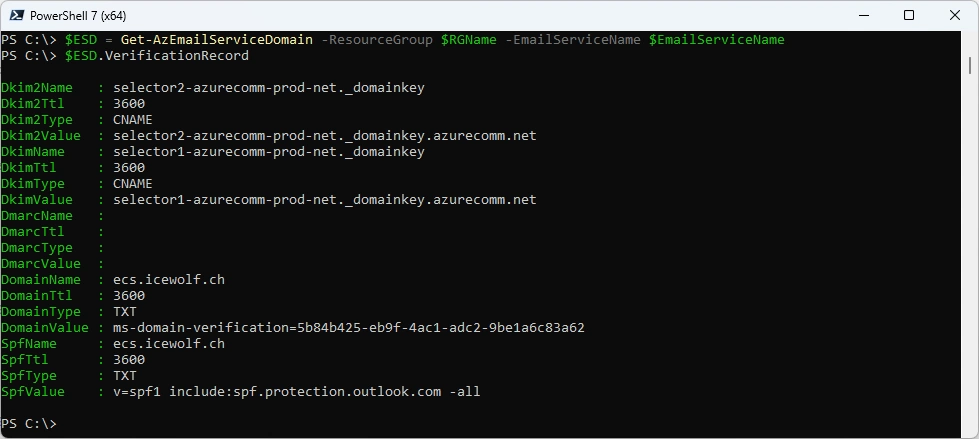
Verification Records
# Get CustomDomain Verification Records
$EmailServiceName = "IcewolfECS"
$RGName = "RG_ACS"
$ESD = Get-AzEmailServiceDomain -ResourceGroup $RGName -EmailServiceName $EmailServiceName
$ESD.VerificationRecord
DNS Zone and Records
Let’s create a new Zone for the subdomain *ecs.icewolf.ch
# Create DNS Zone
$RGName = "RG_ACS"
$DnsZoneName = "ecs.icewolf.ch"
$Location = "global"
$DnsZone = New-AzDnsZone -Name $DnsZoneName -ResourceGroupName $RGName

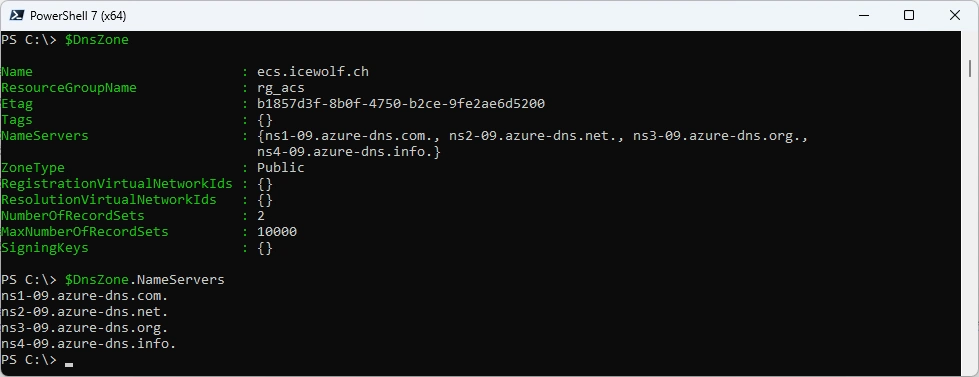
Show the Nameservers - we will need them later when we add a delegation in the parent DNS Zone icewolf.ch
# Name Servers for the DNS Zone
$DNSZone
$DnsZone.NameServers
Add the TXT Records
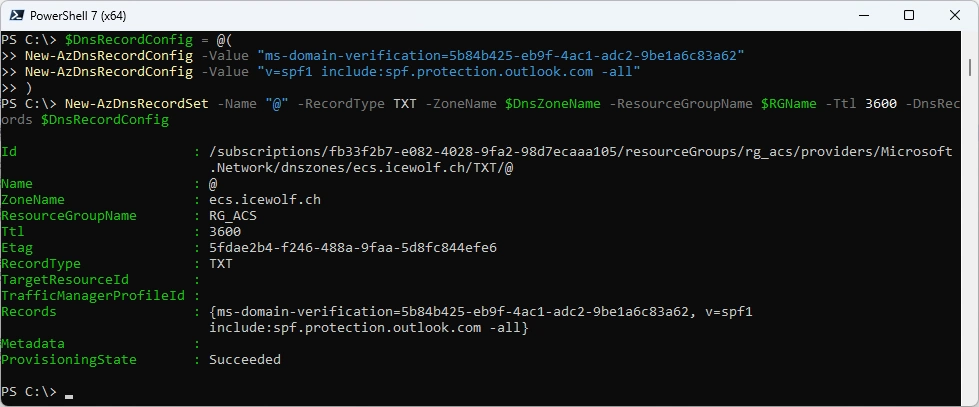
# Add TXT Records (ms-domain-verification / SPF)
$DnsRecordConfig = @(
    New-AzDnsRecordConfig -Value "ms-domain-verification=5b84b425-eb9f-4ac1-adc2-9be1a6c83a62"
    New-AzDnsRecordConfig -Value "v=spf1 include:spf.protection.outlook.com -all"
)
New-AzDnsRecordSet -Name "@" -RecordType TXT -ZoneName $DnsZoneName -ResourceGroupName $RGName -Ttl 3600 -DnsRecords $DnsRecordConfig
Add the DKIM Records
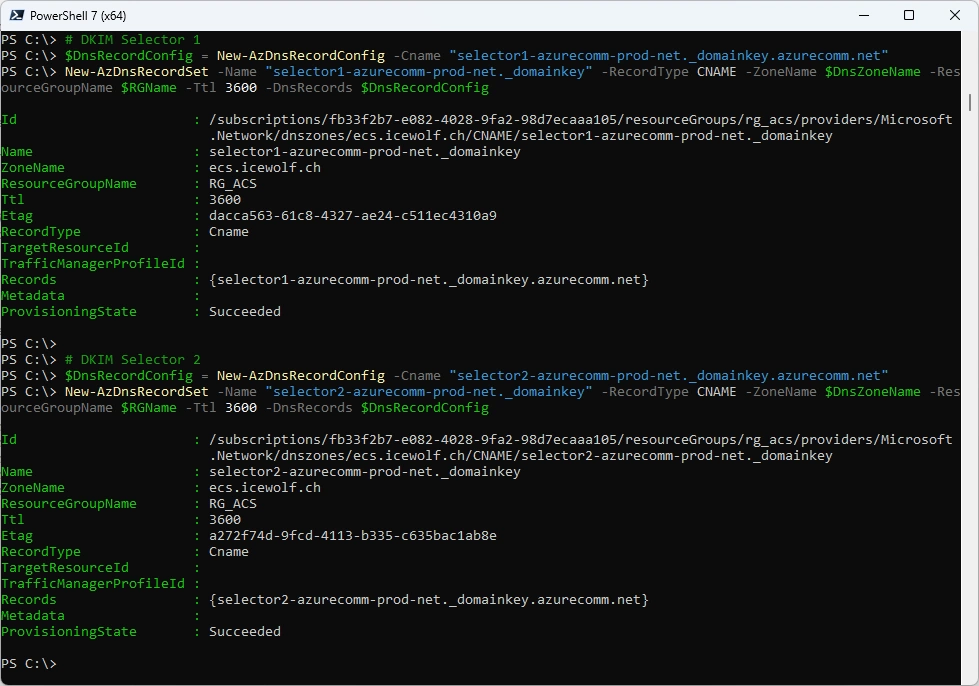
# DKIM Selector 1
$DnsRecordConfig = New-AzDnsRecordConfig -Cname "selector1-azurecomm-prod-net._domainkey.azurecomm.net"
New-AzDnsRecordSet -Name "selector1-azurecomm-prod-net._domainkey" -RecordType CNAME -ZoneName $DnsZoneName -ResourceGroupName $RGName -Ttl 3600 -DnsRecords $DnsRecordConfig

# DKIM Selector 2
$DnsRecordConfig = New-AzDnsRecordConfig -Cname "selector2-azurecomm-prod-net._domainkey.azurecomm.net"
New-AzDnsRecordSet -Name "selector2-azurecomm-prod-net._domainkey" -RecordType CNAME -ZoneName $DnsZoneName -ResourceGroupName $RGName -Ttl 3600 -DnsRecords $DnsRecordConfig
Add the DMARC Record
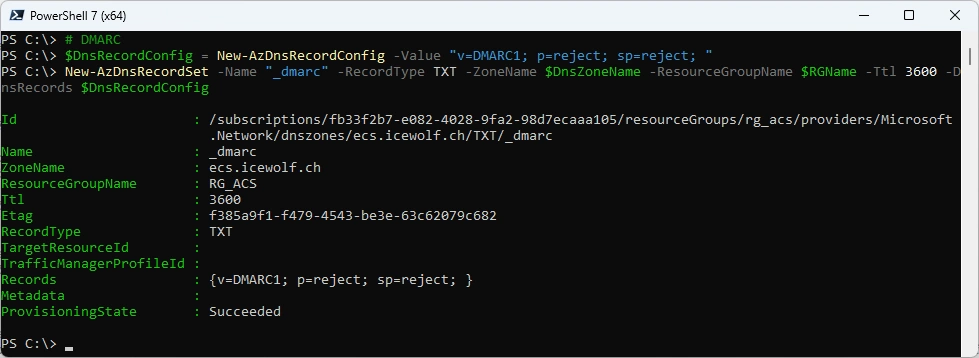
# DMARC
$DnsRecordConfig = New-AzDnsRecordConfig -Value "v=DMARC1; p=reject; sp=reject; "
New-AzDnsRecordSet -Name "_dmarc" -RecordType TXT -ZoneName $DnsZoneName -ResourceGroupName $RGName -Ttl 3600 -DnsRecords $DnsRecordConfig
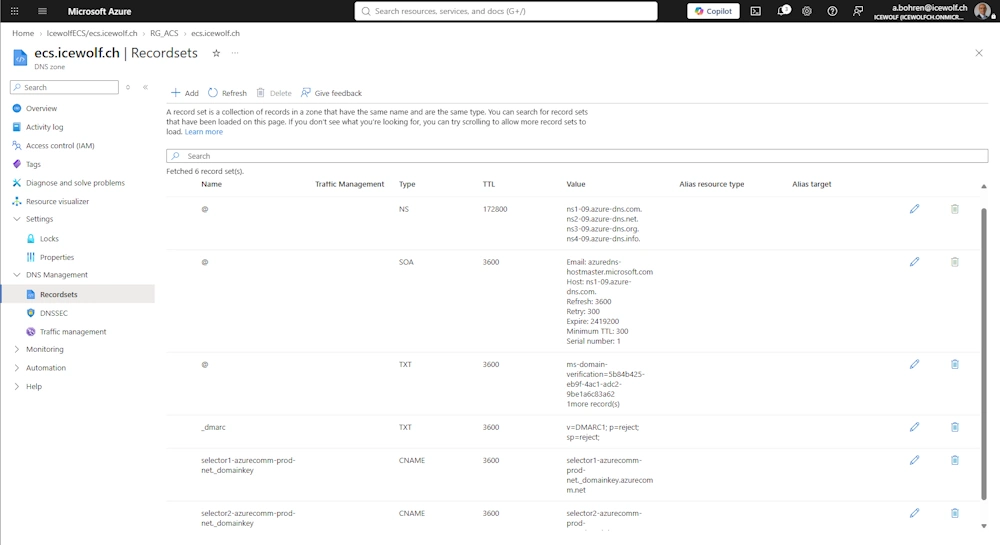
This is how it looks in the Azure Portal
DNS Delegation in Parent Zone
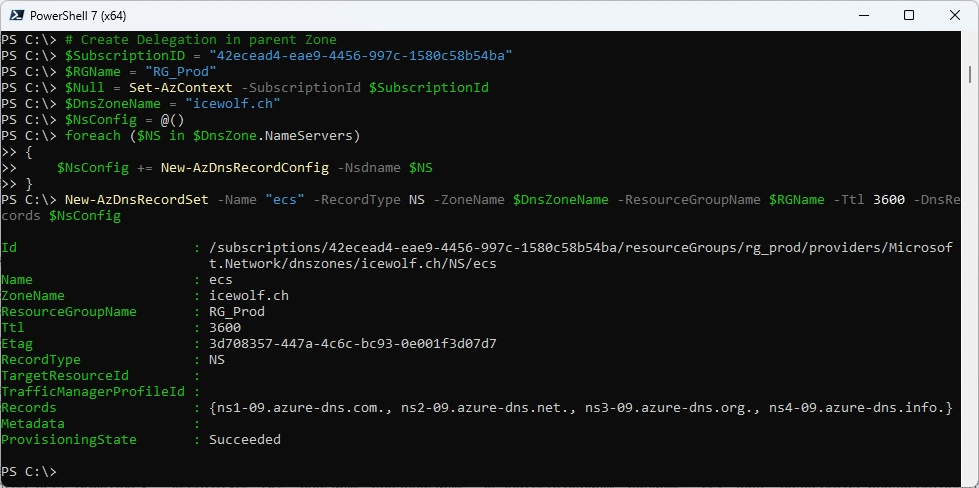
Now we need to create a DNS Delegation for the Subdomain ecs.icewolf.ch in the icewolf.ch parent DNS Zone. We simply add the NS Records for ecs
# Create Delegation in parent Zone
$SubscriptionID = "42ecead4-eae9-4456-997c-1580c58b54ba"
$RGName = "RG_Prod"
$Null = Set-AzContext -SubscriptionId $SubscriptionId

$DnsZoneName = "icewolf.ch"
$NsConfig = @()
foreach ($NS in $DnsZone.NameServers)
{
    $NsConfig += New-AzDnsRecordConfig -Nsdname $NS
}
New-AzDnsRecordSet -Name "ecs" -RecordType NS -ZoneName $DnsZoneName -ResourceGroupName $RGName -Ttl 3600 -DnsRecords $NsConfig
Verify Domain / DNS Records
You can start the verification Process in the Azure Portal
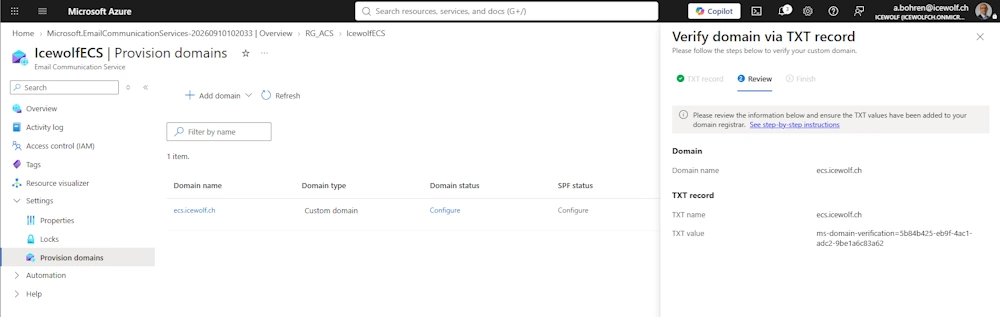
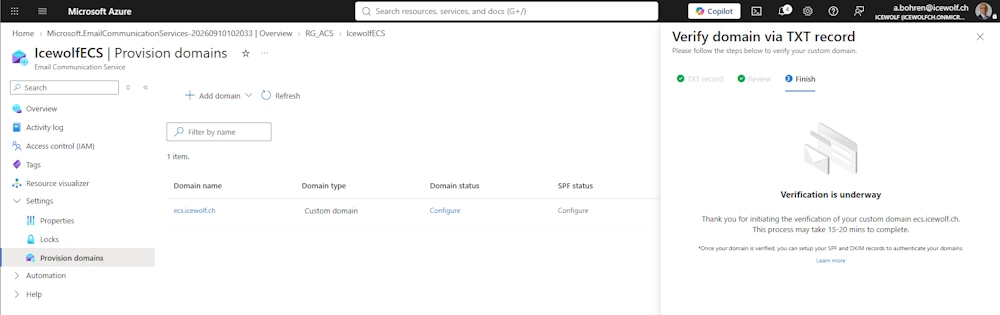
It takes a while until the DNS Records are verified
We can see that the Verification has the Status of “NotStarted”
# Get CustomDomain
$EmailServiceName = "IcewolfECS"
$RGName = "RG_ACS"
Get-AzEmailServiceDomain -ResourceGroup $RGName -EmailServiceName $EmailServiceName
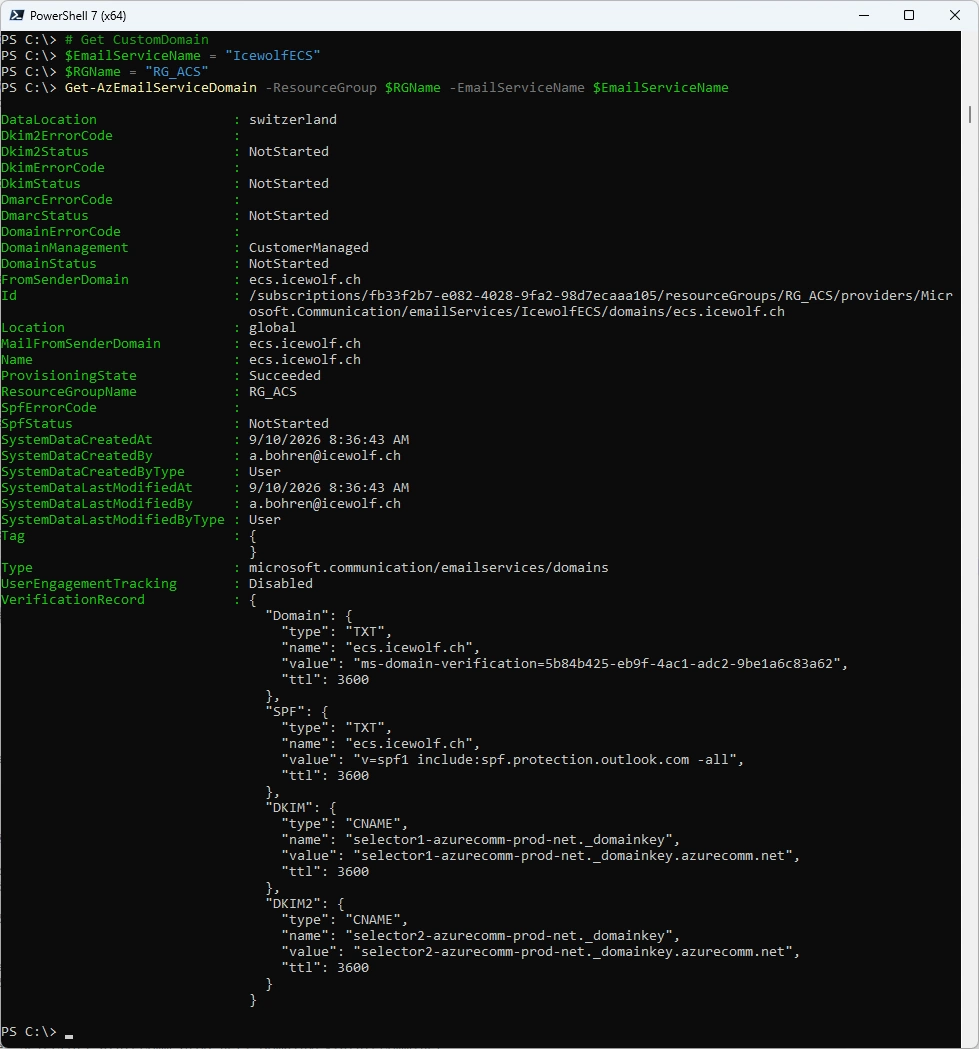
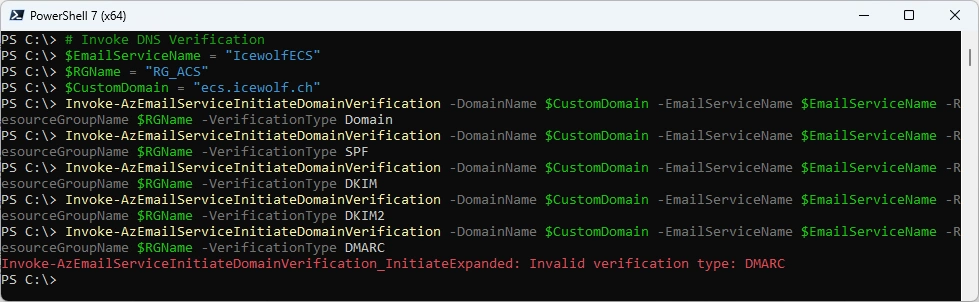
We can invoke the Verification for the Types:
- Domain
- SPF
- DKIM
- DKIM2
There is no DMARC Verification Record but there is a DMARCStatus but can not be invoked
# Invoke DNS Verification
$EmailServiceName = "IcewolfECS"
$RGName = "RG_ACS"
$CustomDomain = "ecs.icewolf.ch"
Invoke-AzEmailServiceInitiateDomainVerification -DomainName $CustomDomain -EmailServiceName $EmailServiceName -ResourceGroupName $RGName -VerificationType Domain
Invoke-AzEmailServiceInitiateDomainVerification -DomainName $CustomDomain -EmailServiceName $EmailServiceName -ResourceGroupName $RGName -VerificationType SPF
Invoke-AzEmailServiceInitiateDomainVerification -DomainName $CustomDomain -EmailServiceName $EmailServiceName -ResourceGroupName $RGName -VerificationType DKIM
Invoke-AzEmailServiceInitiateDomainVerification -DomainName $CustomDomain -EmailServiceName $EmailServiceName -ResourceGroupName $RGName -VerificationType DKIM2
#Invoke-AzEmailServiceInitiateDomainVerification -DomainName $CustomDomain -EmailServiceName $EmailServiceName -ResourceGroupName $RGName -VerificationType DMARC
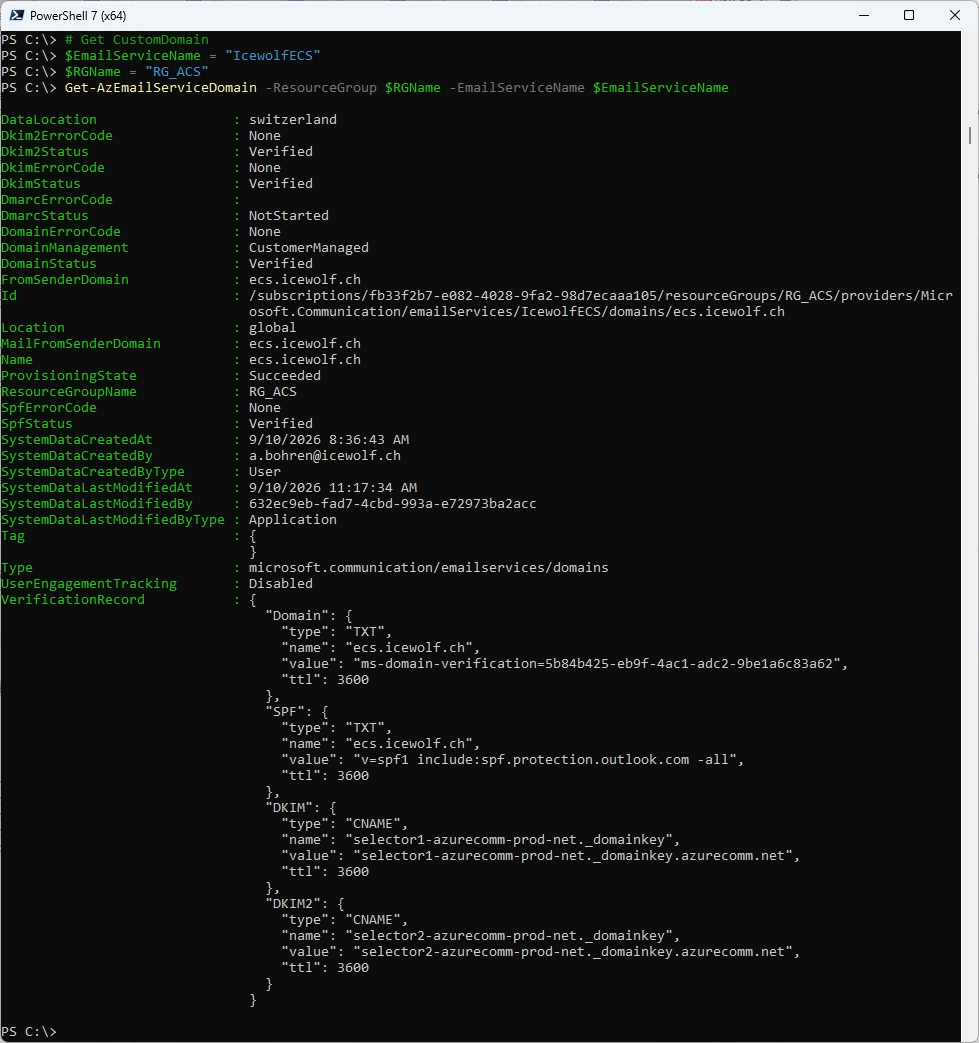
Check if the DNS Records have been verified
# Get CustomDomain
$EmailServiceName = "IcewolfECS"
$RGName = "RG_ACS"
Get-AzEmailServiceDomain -ResourceGroup $RGName -EmailServiceName $EmailServiceName
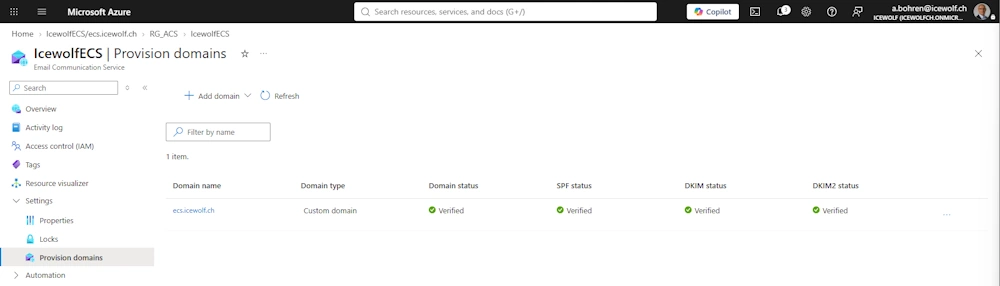
Also the Azure Portal is happy with the Verification
Azure Communication Services
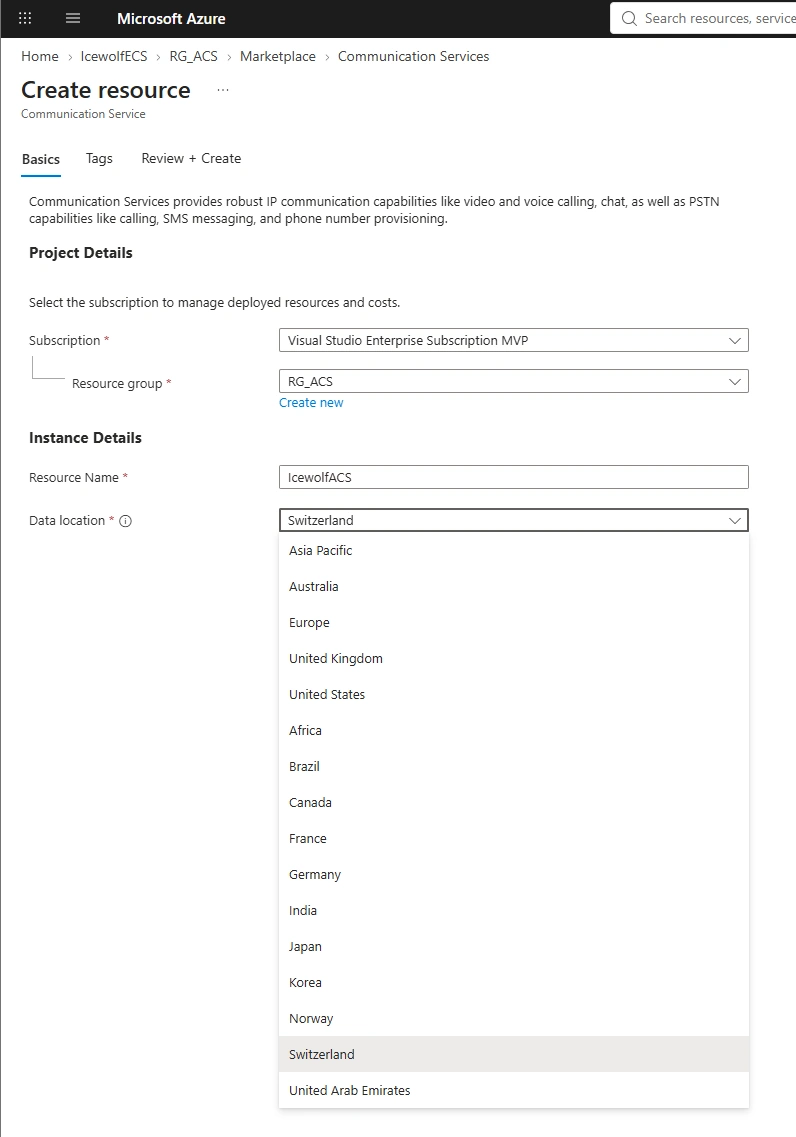
Now we need to deploy an Azure Communication Services (ACS) Instance
# Create ACS
$ACSName = "IcewolfACS"
$RGName = "RG_ACS"
$DataLocation = "Switzerland"
New-AzCommunicationService -ResourceGroupName $RGName -Name $ACSName -DataLocation $DataLocation -Location Global
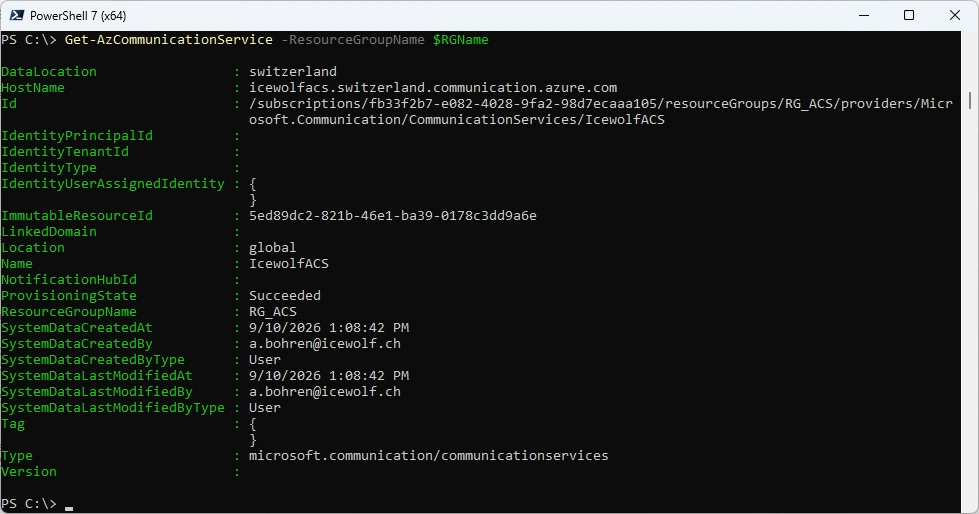
Let’s check the details
# Get ACS
Get-AzCommunicationService -ResourceGroupName $RGName
Now we need to Connect or Link the ECS Domain with ACS
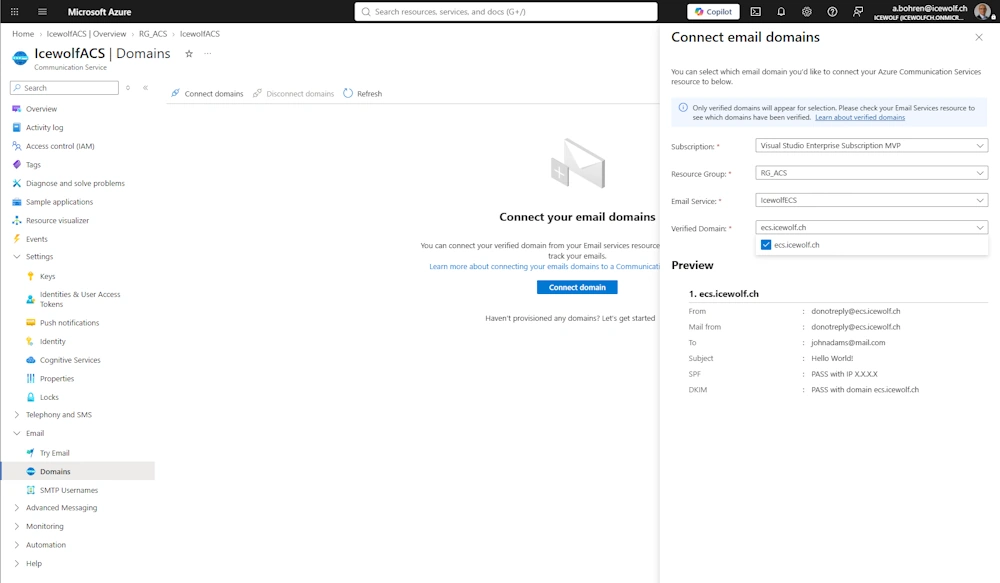
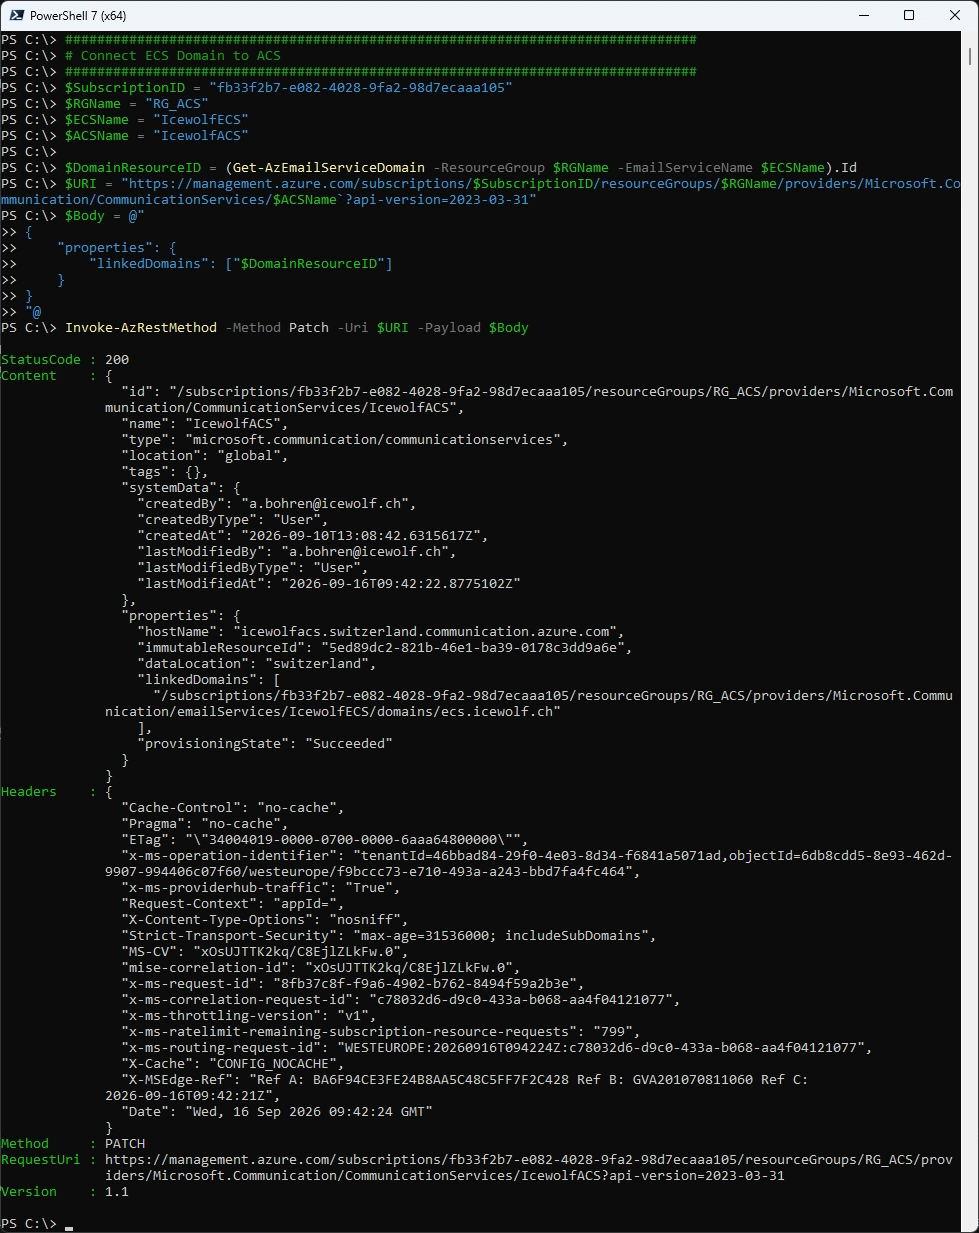
There is no Command in the AZ.Communication Module but we can use the Azure Management Rest API
# Connect ECS Domain to ACS
$SubscriptionID = "fb33f2b7-e082-4028-9fa2-98d7ecaaa105"
$RGName = "RG_ACS"
$ECSName = "IcewolfECS"
$ACSName = "IcewolfACS"

$ContentType = "application/json"
$DomainResourceID = (Get-AzEmailServiceDomain -ResourceGroup $RGName -EmailServiceName $ECSName).Id
$URI = "https://management.azure.com/subscriptions/$SubscriptionID/resourceGroups/$RGName/providers/Microsoft.Communication/CommunicationServices/$ACSName`?api-version=2023-03-31"
$Body = @"
{
    "properties": {
        "linkedDomains": ["$DomainResourceID"]
    }
}
"@
$Body = $Body | ConvertTo-Json -Depth 10
Invoke-AzRestMethod -Method Patch -Uri $URI -Body $Body -ContentType $ContentType
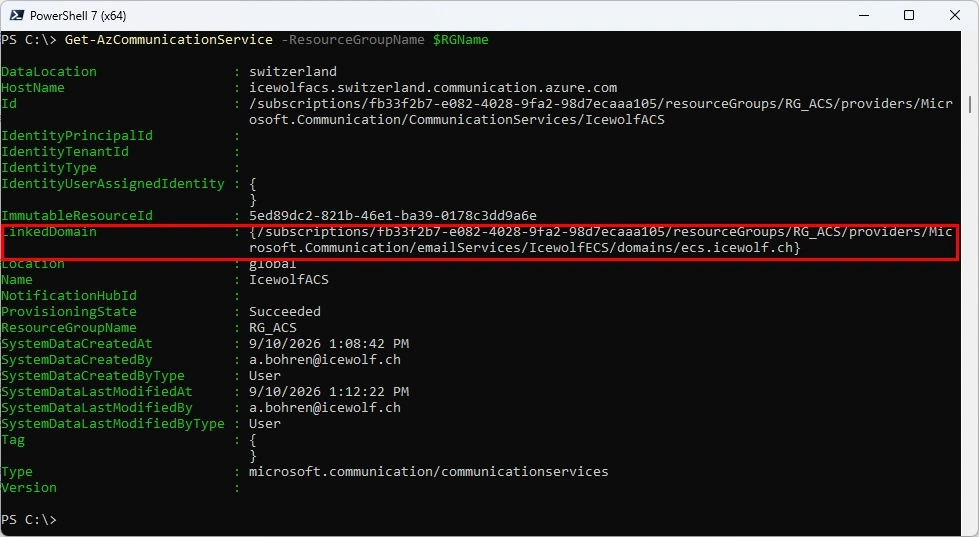
Now we can see the Linked Domain
# Get ACS
$RGName = "RG_ACS"
Get-AzCommunicationService -ResourceGroupName $RGName
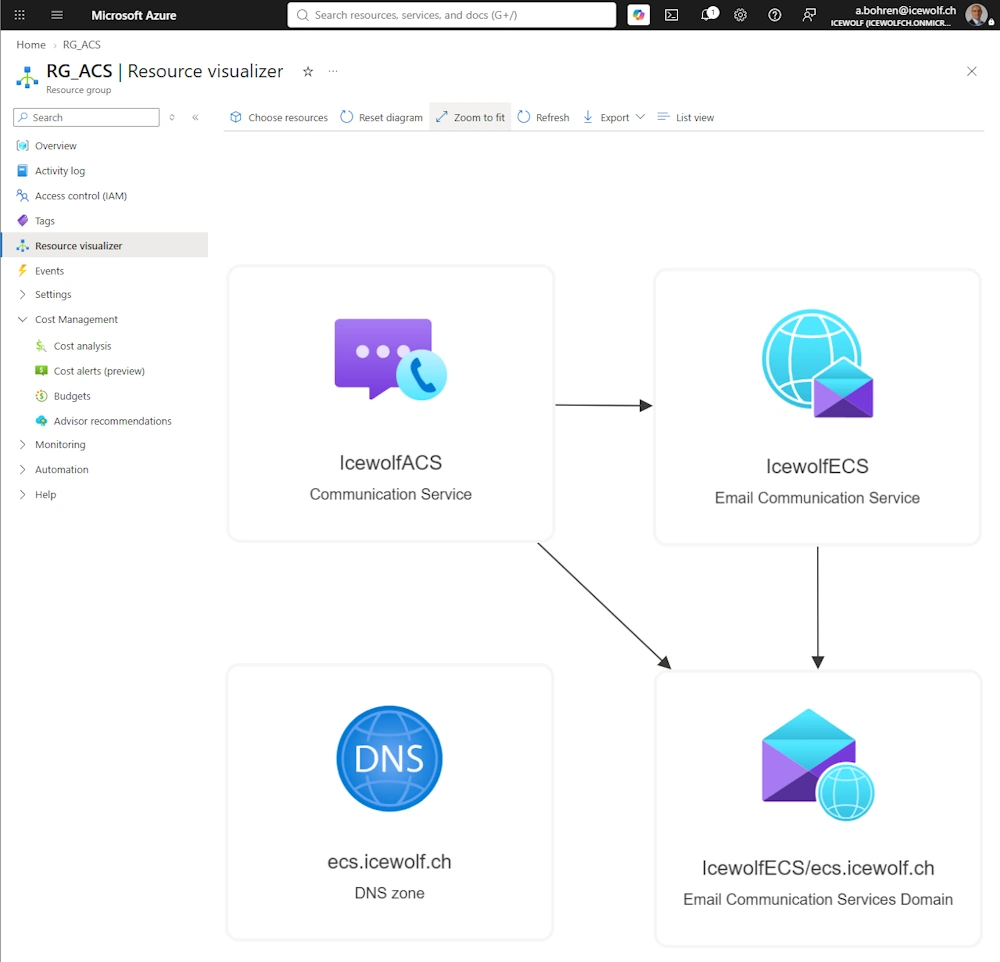
These are the Resources in the Resource Group
Send Mail with AZ PowerShell
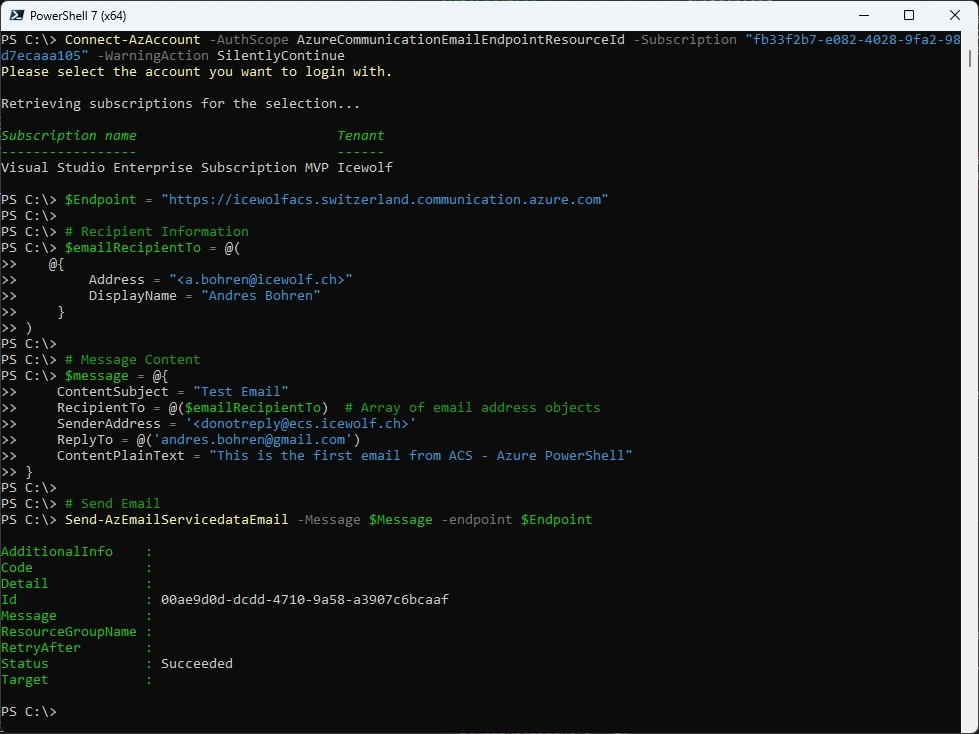
Now we are able to send An Email with AZ PowerShell
Connect-AzAccount -AuthScope AzureCommunicationEmailEndpointResourceId -Subscription "fb33f2b7-e082-4028-9fa2-98d7ecaaa105" -WarningAction SilentlyContinue
$Endpoint = "https://icewolfacs.switzerland.communication.azure.com"

# Recipient Information
$emailRecipientTo = @(
   @{
        Address = "<a.bohren@icewolf.ch>"
        DisplayName = "Andres Bohren"
    }
)

# Message Content
$message = @{
    ContentSubject = "Test Email"
    RecipientTo = @($emailRecipientTo)  # Array of email address objects
    SenderAddress = '<donotreply@ecs.icewolf.ch>'
    ReplyTo = @('andres.bohren@gmail.com')
    ContentPlainText = "This is the first email from ACS - Azure PowerShell"
}

# Send Email
Send-AzEmailServicedataEmail -Message $Message -endpoint $Endpoint
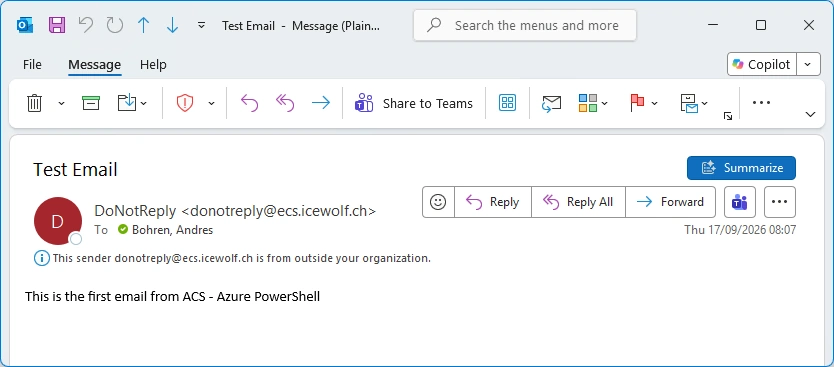
Mail in Outlook
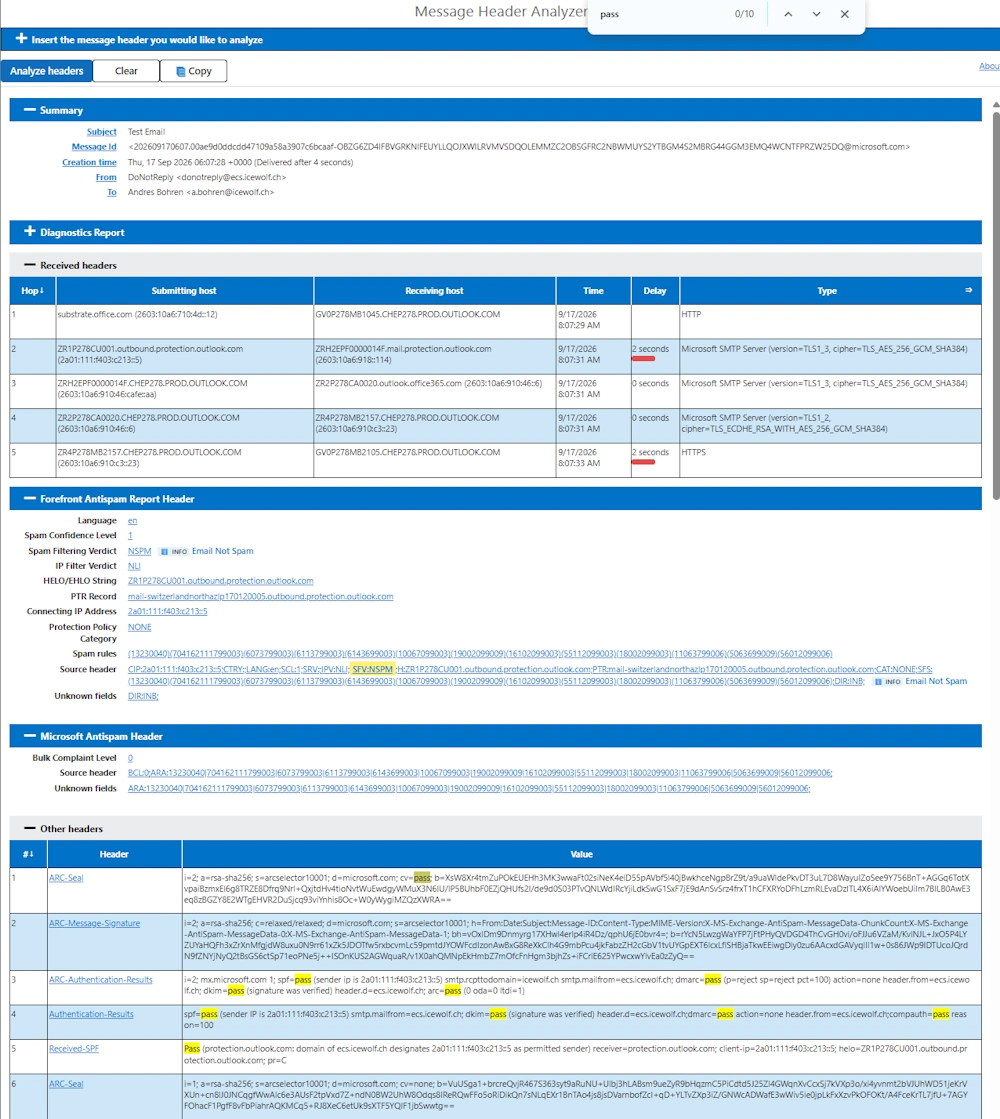
Headers in Message Header Analyzer - SPF / DKIM / DMARC have passed 😎
SMTP Authentication
I also wanted to try out SMTP Authentication. This was more complicated than i was expecting.
Requirements
- Entra Application / Entra Service Principal
- Client Secret (will figure as SMTP Password)
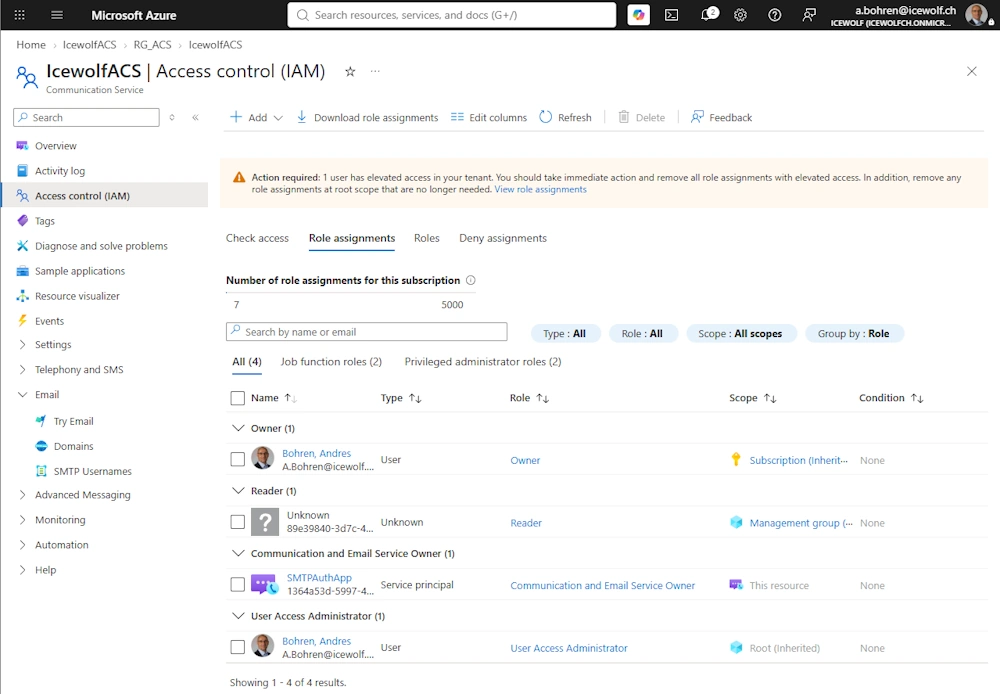
- In Azure add “Communication and Email Service Owner” Role to Service Principal of the Entra Application to ACS
- Create SMTP Username
Create Entra Application
# Create Entra Application for SMTP Authentication
$AppName = "SMTPAuthApp"
$App = New-AzADApplication -DisplayName $AppName
$AppID = $App.AppID
$AppID

Optional: Add Owner to Entra Applicaton
# Add Owner to the Entra Application
Connect-MgGraph -Scopes Application.ReadWrite.All -NoWelcome
$App = Get-MgApplication -Filter "displayName eq 'SMTPAuthApp'"
$User = Get-MgUser -UserId "a.bohren@icewolf.ch"
$params = @{
    "@odata.id" = "https://graph.microsoft.com/v1.0/directoryObjects/$($User.Id)"
}
New-MgApplicationOwnerByRef -ApplicationId $App.Id -BodyParameter $params

Now i wanted to add a Client Secret - but thats blocked by a Policy
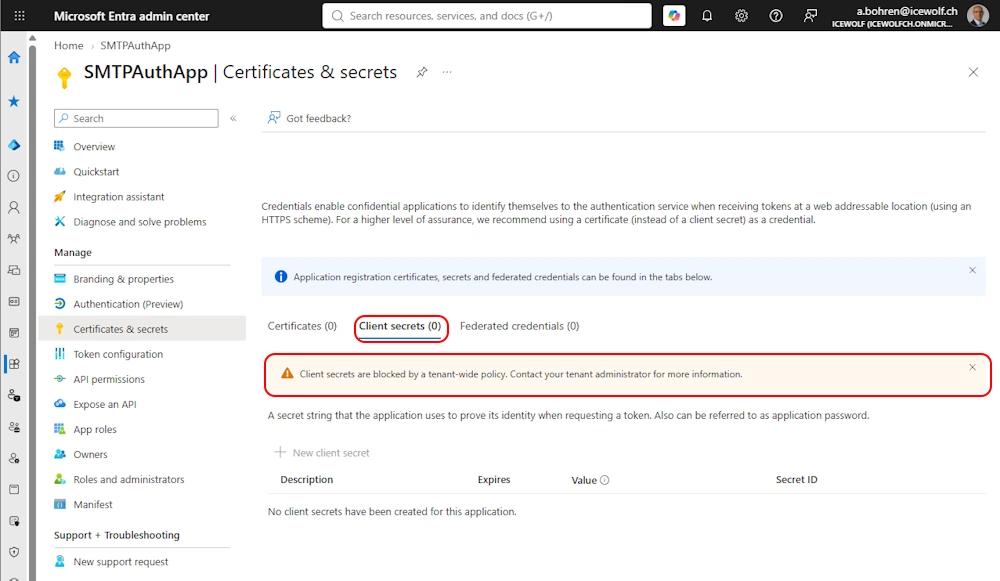
Entra Admin Center > Enterprise Applications > Application Policies > Password restrictions > Block password addition
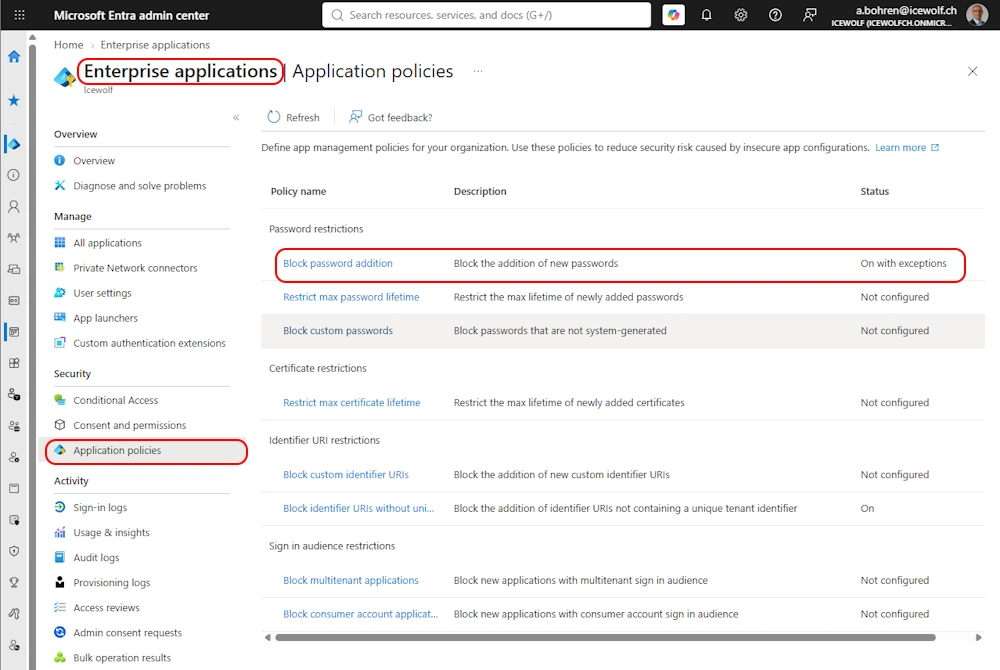
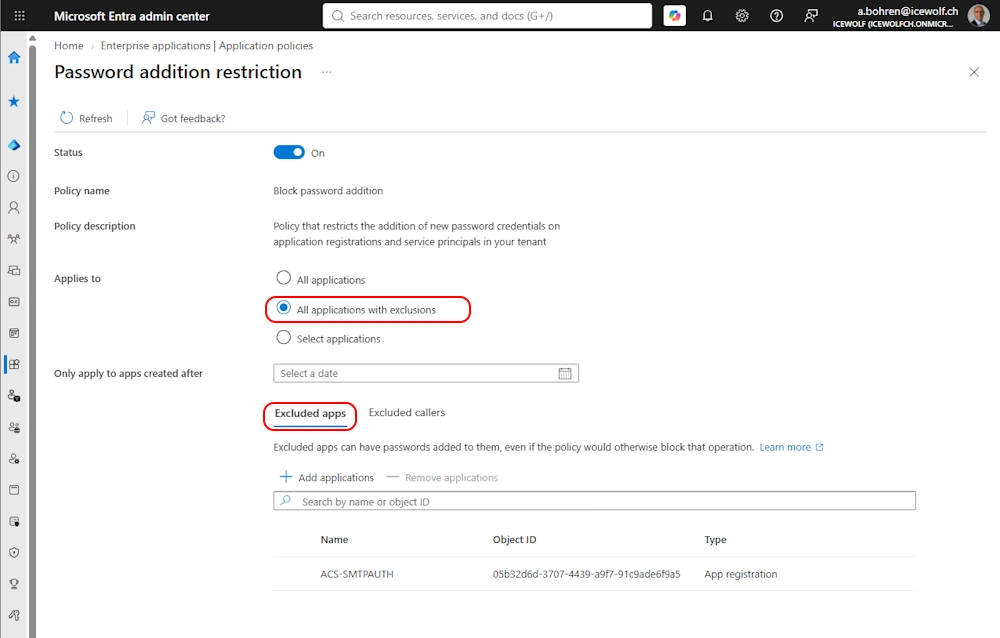
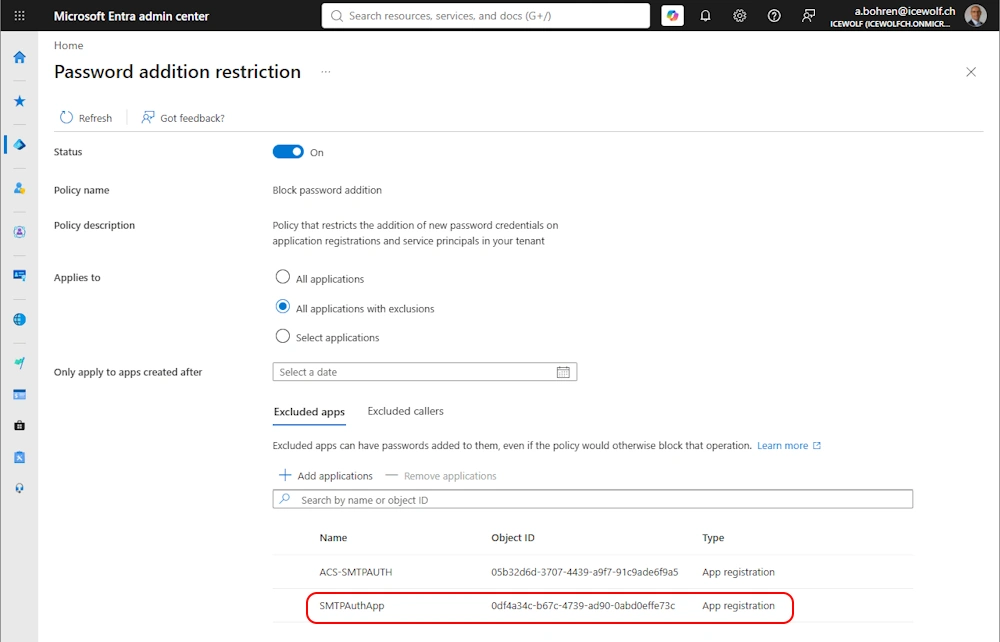
Here we can select “All applications with exclusions” and add the App to the exclusion list
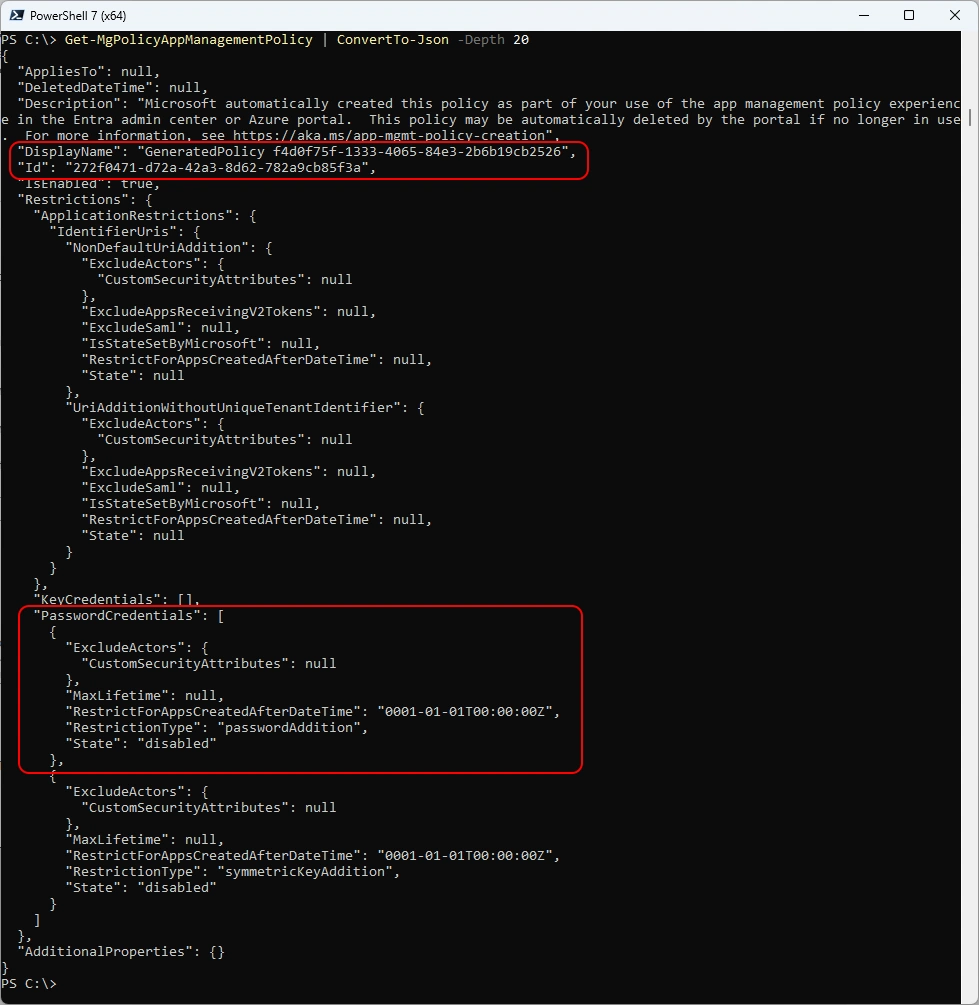
Let’s have a look at the AppManagement Policy
# Get Entra Application Policy
Connect-MgGraph -Scopes Policy.ReadWrite.ApplicationConfiguration
Get-MgPolicyAppManagementPolicy | ConvertTo-Json -Depth 20
Now we add the Application to the exlusion List
# Exclude the Entra Application from the default app management policy
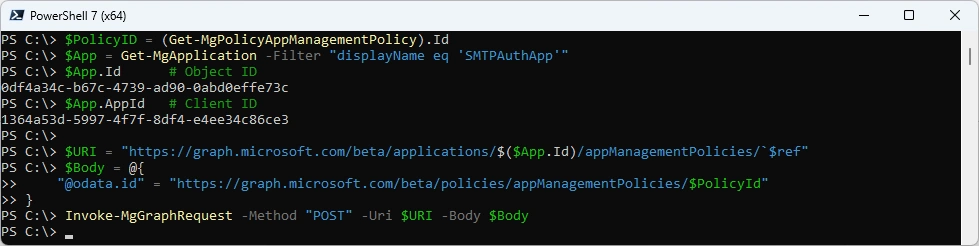
$PolicyID = (Get-MgPolicyAppManagementPolicy).Id
$App = Get-MgApplication -Filter "displayName eq 'SMTPAuthApp'"
$App.Id      # Object ID
$App.AppId   # Client ID

$URI = "https://graph.microsoft.com/beta/applications/$($App.Id)/appManagementPolicies/`$ref"
$Body = @{
    "@odata.id" = "https://graph.microsoft.com/beta/policies/appManagementPolicies/$PolicyId"
}
Invoke-MgGraphRequest -Method "POST" -Uri $URI -Body $Body
The App is now added in the exlusion list
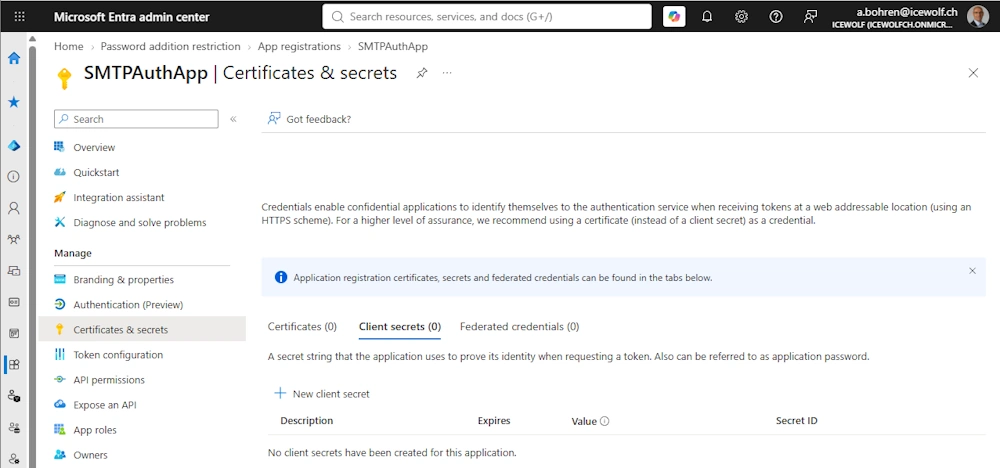
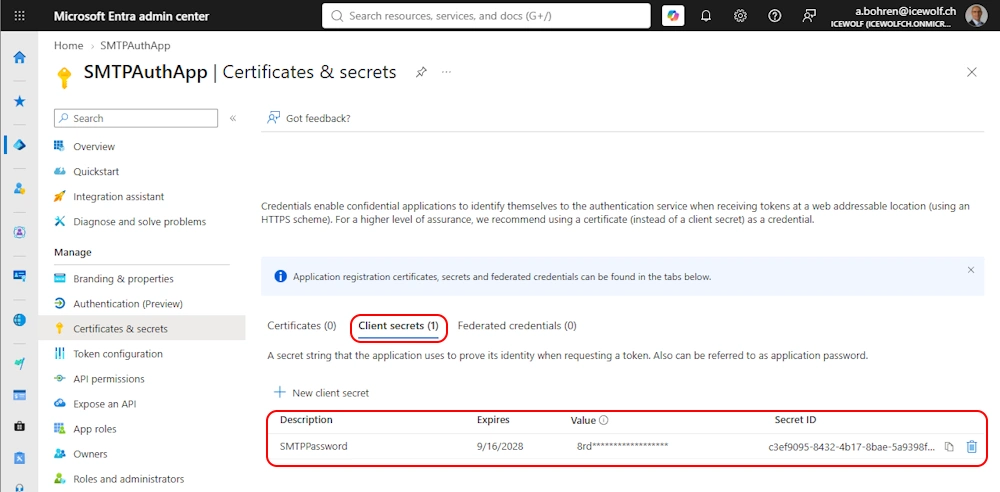
Now we can add ClientSecrets - it’s no longer blocked by the Policy
# Add ClientSecret to the Entra Application
$App = Get-MgApplication -Filter "appId eq '$AppID'"

$PasswordCredential = @{
    DisplayName = "SMTPPassword"
    EndDateTime = (Get-Date).AddYears(2)
}
$Secret = Add-MgApplicationPassword -ApplicationId $App.Id -PasswordCredential $PasswordCredential
$ClientSecret = $Secret.SecretText
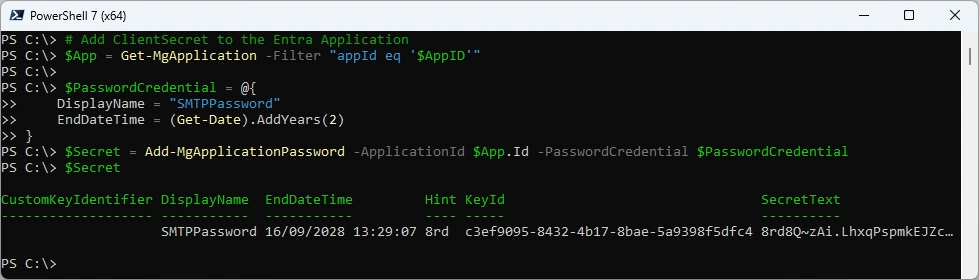
The ClientSecret has been addet
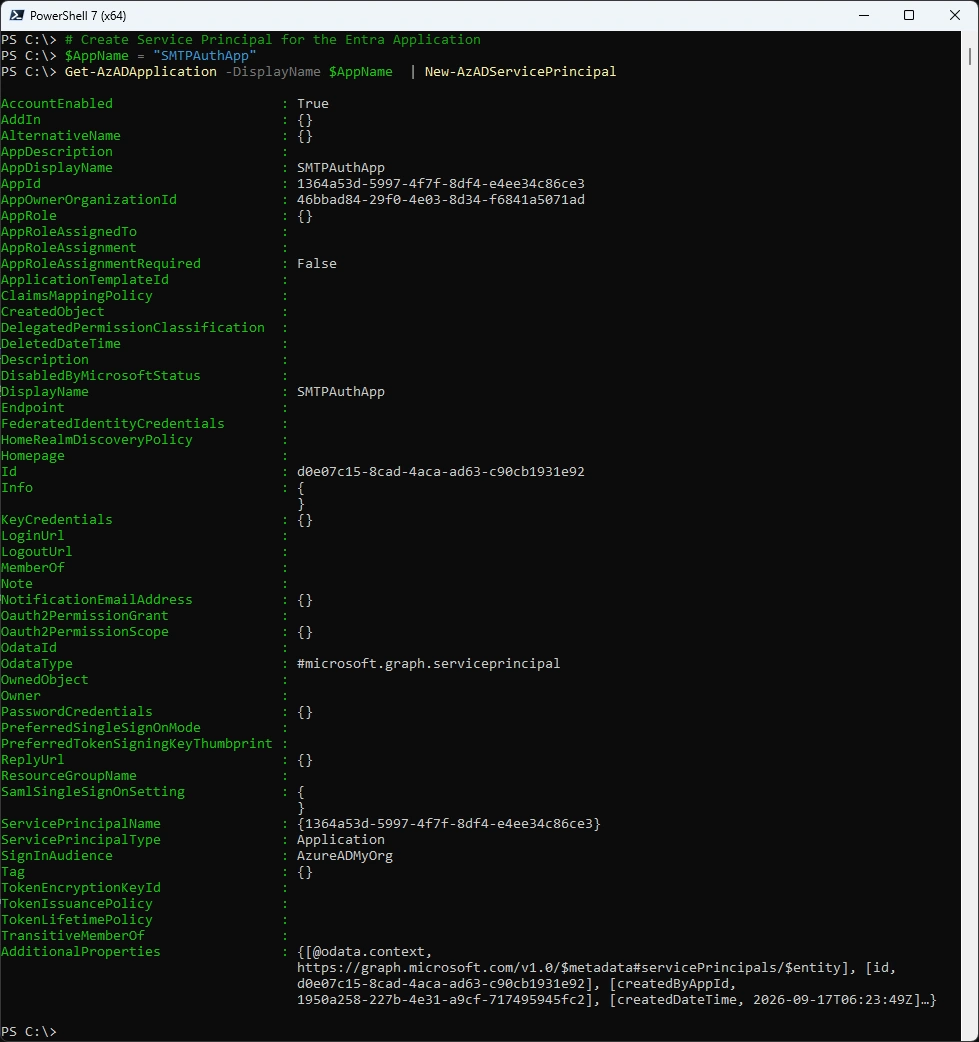
Create Service Principal
# Create Service Principal for the Entra Application
$AppName = "SMTPAuthApp"
Get-AzADApplication -DisplayName $AppName  | New-AzADServicePrincipal
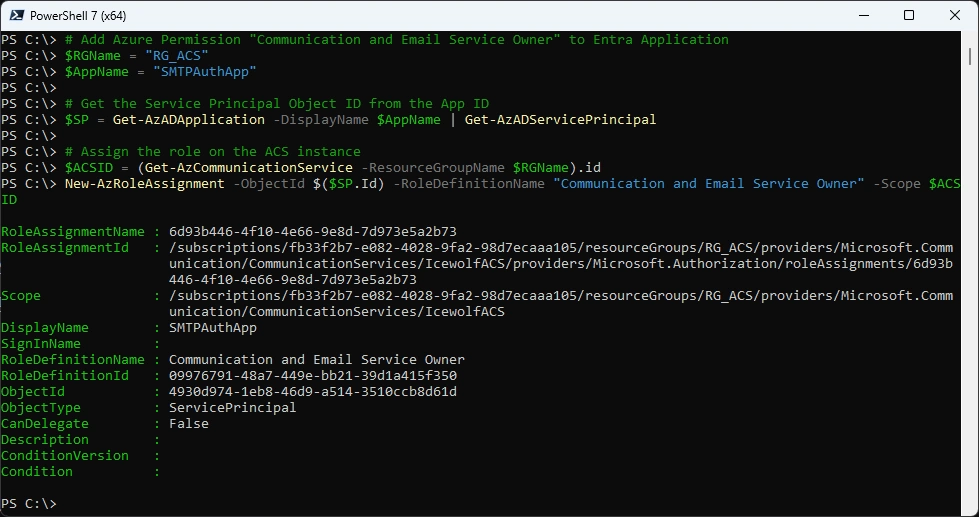
Add Azure Permission “Communication and Email Service Owner” on ACS for Service Principal
# Add Azure Permission "Communication and Email Service Owner" to Service Principal for ACS
$RGName = "RG_ACS"
$AppName = "SMTPAuthApp"

# Get the Service Principal Object ID from the App ID
$SP = Get-AzADApplication -DisplayName $AppName | Get-AzADServicePrincipal

# Assign the role on the ACS instance
$ACSID = (Get-AzCommunicationService -ResourceGroupName $RGName).id
New-AzRoleAssignment -ObjectId $($SP.Id) -RoleDefinitionName "Communication and Email Service Owner" -Scope $ACSID
Permissions set in Azure Portal
Now we can add the SMTP Username
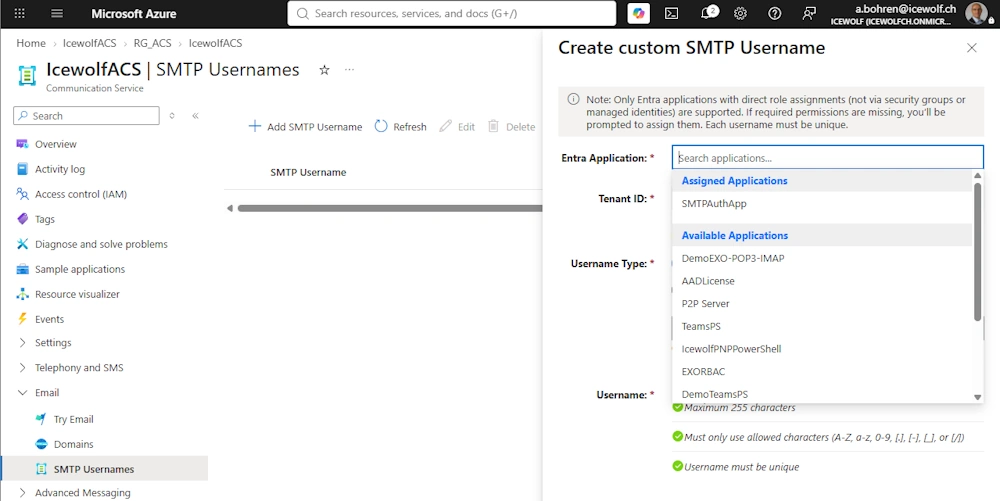
# Register SMTP Username
$ACSName = "IcewolfACS"
$RGName = "RG_ACS"
$AppID = "1364a53d-5997-4f7f-8df4-e4ee34c86ce3"
$TenantID = "46bbad84-29f0-4e03-8d34-f6841a5071ad"
New-AzCommunicationServiceSmtpUsername -CommunicationServiceName $ACSName -ResourceGroupName $RGName -SmtpUsername "donotreply" -EntraApplicationId $AppId -TenantId $TenantId -Username "donotreply@ecs.icewolf.ch"
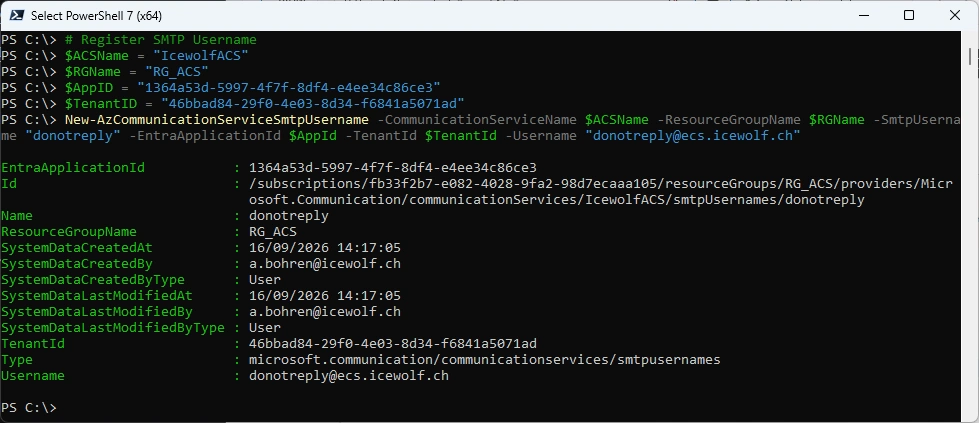
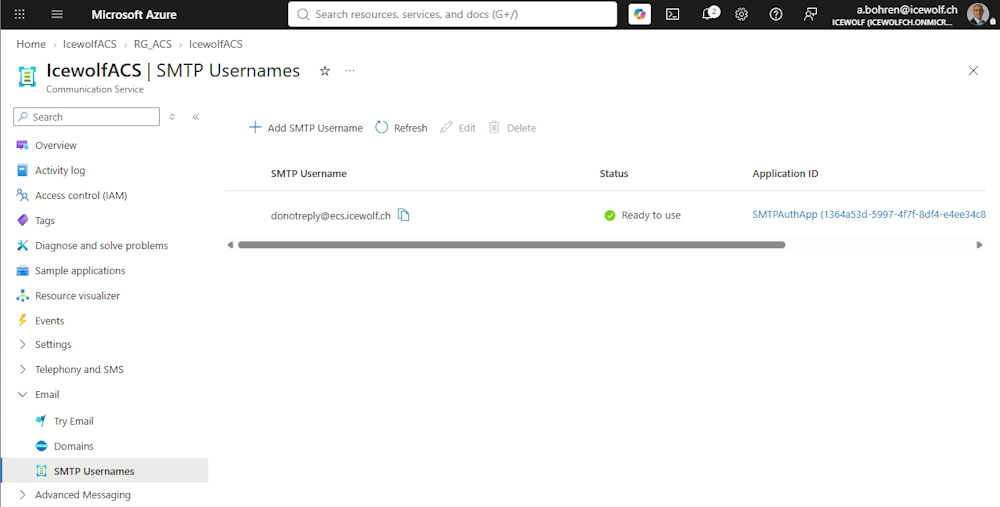
SMTP Username has been added
# Send Authenticated Email
$Password = ConvertTo-SecureString -AsPlainText -Force -String "$ClientSecret"
$Cred = New-Object -TypeName PSCredential -ArgumentList "donotreply@ecs.icewolf.ch", $Password
Send-MailMessage -From "donotreply@ecs.icewolf.ch" -To "a.bohren@icewolf.ch" -Subject "Test mail" -Body "Test" -SmtpServer "smtp.azurecomm.net" -Port 587 -Credential $Cred -UseSsl -WarningAction SilentlyContinue

Mail in Outlook
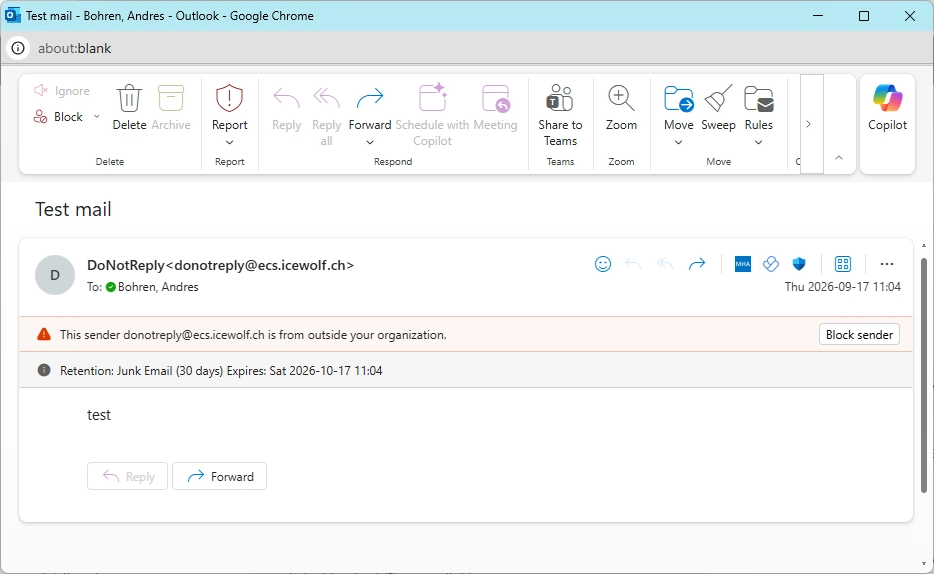
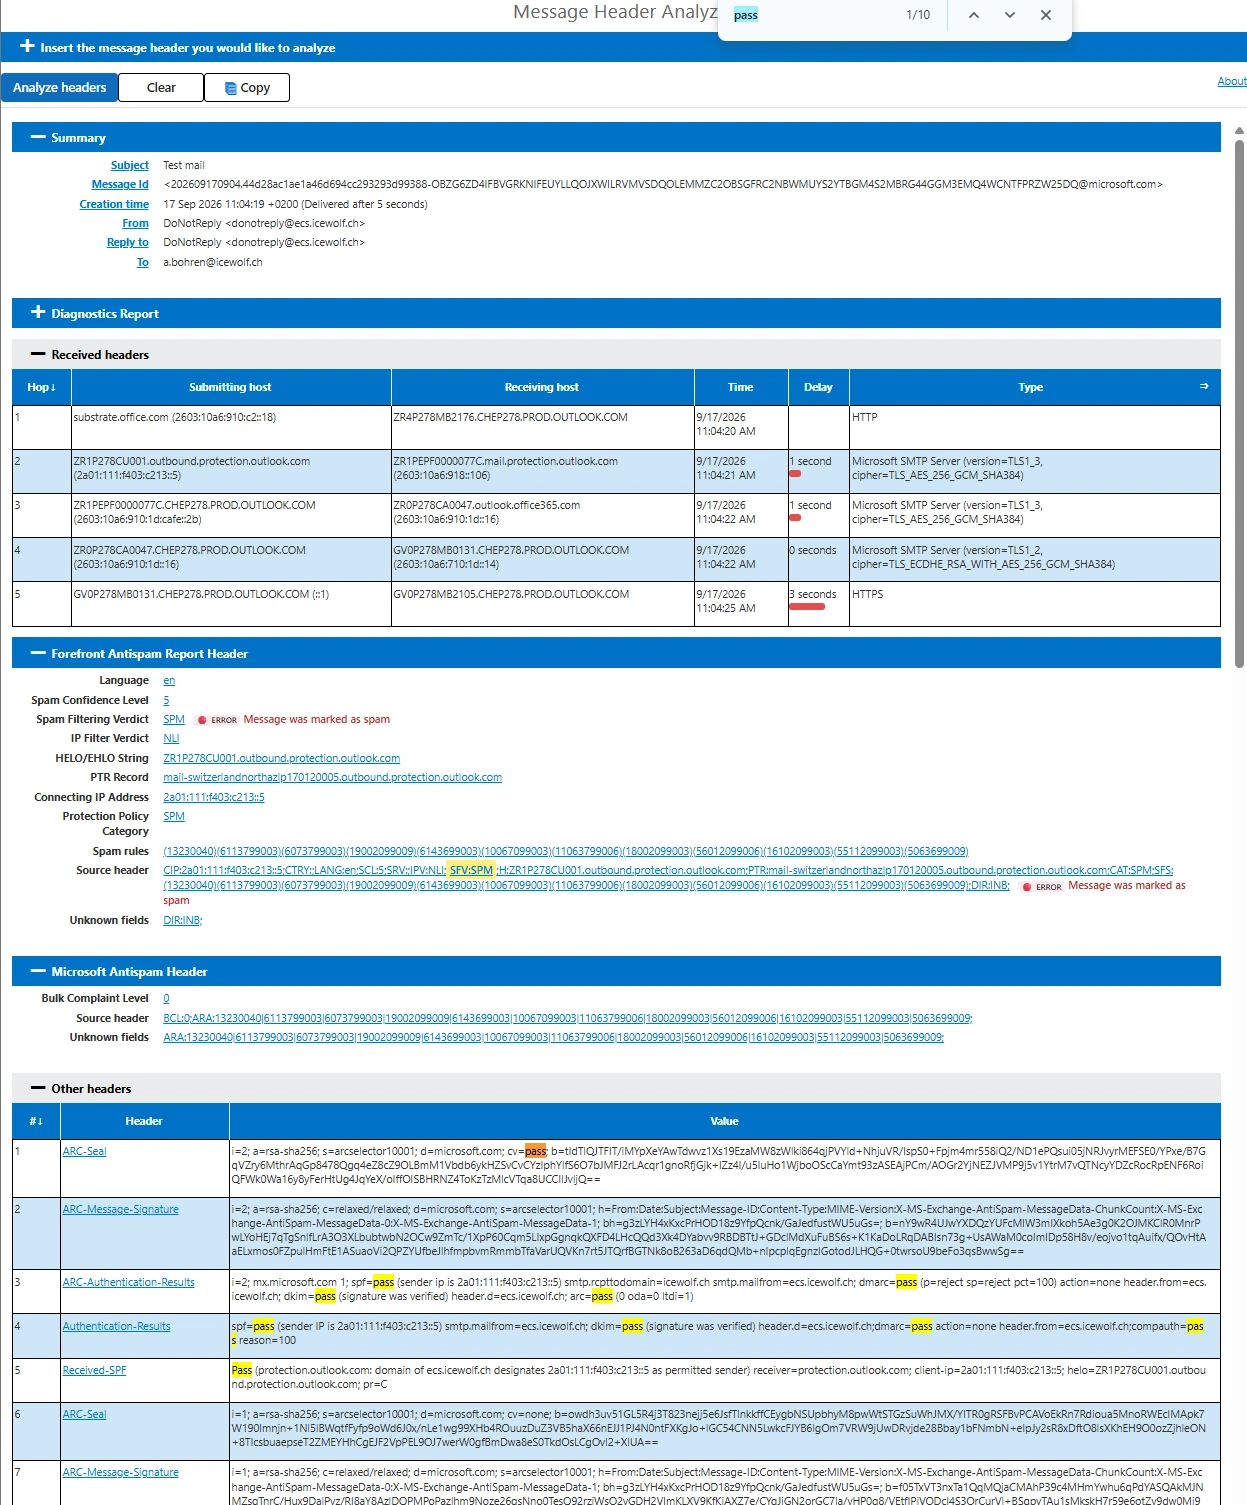
Headers in Message Header Analyzer
The Mail has gone to the Junk-E-Mail Folder. Maybe the text was just to short. But SPF / DKIM / DMARC have passed 😎
Summary
The Azure Email Communication Service takes many steps to configure. Especially the SMTP Authentication is way more complex than i exptected to be. Requiring an Entra App just for the ClientSecret as Password and needing the ServicePrincipal have Permissions on the ACS seems a bit overengineered.
In addition the costs are quite significant, as soon as you send more than a couple of Mails.
Good to know how it works and beeing able to provide most of it as PowerShell Scripts will hopefully others help too.
Note: All the PowerShell Code is also available in my GitHub Repo SetupECS_ACS.ps1
Regards
Andres Bohren
Azure Logo PowerShell Logo
